How to Increase Humidity for Tropical Houseplants

Tropical houseplants can bring a lush, vibrant feel to almost any room, but keeping them healthy indoors sometimes requires more than regular watering and good sunlight. Many popular tropical plants naturally grow in warm, humid environments, where moisture is present not only in the soil but also in the surrounding air. When indoor air becomes too dry, especially in air-conditioned or heated rooms, some tropical houseplants may begin showing brown leaf edges, curling leaves, crispy new growth, or slower development.

Fortunately, increasing humidity for tropical houseplants does not have to be complicated. There are several practical ways to create a more comfortable environment, from grouping plants together to using a humidifier or making small changes to where plants are positioned.

The key is understanding how humidity affects plants and choosing a method that fits your home, your plants, and your daily routine.
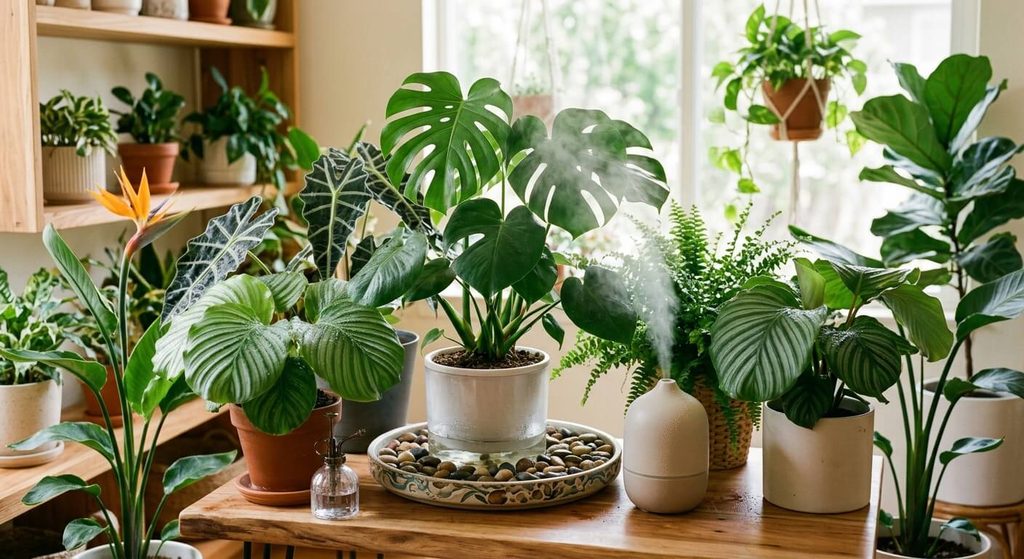
How to Increase Humidity for Tropical Houseplants
image generated using Google Gemini AI

Why Humidity Matters for Tropical Houseplants

Humidity refers to the amount of water vapor present in the air. Tropical plants are adapted to environments where humidity can remain relatively high, particularly in rainforests and other moist habitats.

Plants lose water through tiny openings in their leaves called stomata. This natural process, known as transpiration, helps regulate the plant and move water and nutrients through its tissues. When the surrounding air is very dry, water can leave the leaves more quickly.

A plant growing in consistently dry indoor air may struggle to maintain the moisture balance it is accustomed to.

This does not mean every tropical houseplant requires extremely high humidity. Different species have different tolerances. A tough houseplant may adapt to average indoor conditions, while a humidity-loving plant such as a calathea, anthurium, fern, or some tropical foliage varieties may respond more noticeably to dry air.

What Humidity Level Do Tropical Houseplants Need?

There is no single humidity percentage that is perfect for every tropical houseplant.

Many tropical plants can adapt to ordinary household humidity, but humidity-loving species generally appreciate conditions that are more humid than a very dry indoor environment. Instead of trying to create a rainforest inside your home, aim for a stable environment appropriate for the particular plant.

A digital hygrometer can make this much easier. Rather than guessing whether a room feels dry, you can measure the relative humidity directly.

If your plant repeatedly develops crispy leaf edges despite proper watering, appropriate lighting, and healthy roots, checking the humidity around it can help identify whether dry air may be contributing to the problem.

1. Use a Humidifier

For consistently dry indoor environments, a humidifier is one of the most effective ways to increase humidity.

A humidifier adds water vapor to the surrounding air, allowing you to raise humidity throughout a room rather than only around one plant.

This can be particularly useful if you have a large collection of tropical houseplants.

Choose the Right Size

The humidifier should be appropriate for the size of the room. A small unit may work well beside a plant shelf, while a larger room may require a model designed for greater coverage.

It is also useful to choose a humidifier that is easy to clean and refill. A device that is inconvenient to maintain is less likely to be used consistently.

Avoid Placing It Directly Against the Plant

You do not need to point the mist directly at the leaves.

The goal is to raise the humidity of the surrounding air, not to keep the foliage constantly wet. Excess moisture sitting on leaves can contribute to fungal and bacterial problems, particularly when air circulation is poor.

Position the humidifier so moisture can disperse throughout the space.

Keep the Humidifier Clean

Regular cleaning is important. Standing water and dirty humidifiers can become sources of microorganisms and mineral buildup.

Follow the manufacturer’s cleaning instructions and change the water as recommended.

2. Group Tropical Plants Together

One of the simplest ways to increase humidity around houseplants is to place several plants together.

Plants naturally release moisture through transpiration. When multiple plants are grouped in the same area, the air immediately around them can become somewhat more humid than the surrounding room.

This creates a small, localized microclimate.

You do not need a huge collection of plants to try this technique. Even several plants arranged together on a shelf, plant stand, or table can create a more sheltered environment.

However, avoid packing plants so tightly that air cannot move between them. Good airflow is still important for reducing the risk of fungal problems and pests.

3. Place Plants on a Humidity Tray

A humidity tray is another traditional method for increasing humidity around individual plants.

To make one, place a shallow tray beneath or near the plant and add pebbles or gravel. Add water to the tray, keeping the water level below the top of the stones.

The plant pot should sit on the pebbles rather than directly in standing water.

As water evaporates, it can increase moisture in the immediate area around the plant.

Does a Humidity Tray Really Work?

A humidity tray can provide some localized humidity, but its effect is usually limited. It is unlikely to dramatically increase the humidity of an entire room.

Think of it as a small environmental adjustment rather than a replacement for a humidifier.

It can be particularly useful when you want to make a modest change without adding another electrical device.

4. Move Plants Away From Dry Air Sources

Sometimes the easiest humidity improvement is simply changing where the plant lives.

Air conditioners, heaters, fans, and strong drafts can create drier conditions around foliage. A plant sitting directly beside an air-conditioning vent may experience a noticeably different environment from a plant several feet away.

Look around your room and identify areas where air is constantly moving.

Avoid placing humidity-sensitive plants directly in front of:

  • Air-conditioning vents
  • Heating vents
  • Strong fans
  • Frequently opened exterior doors
  • Drafty windows

This does not mean tropical plants should be kept in completely stagnant air. Gentle air movement is beneficial. The problem is prolonged exposure to strong, drying airflow.

5. Keep Plants in Naturally Humid Rooms

Some rooms naturally have more moisture in the air than others.

Bathrooms can sometimes provide a good environment for tropical houseplants, particularly when they receive sufficient natural or supplemental light.

A bright bathroom with regular shower use may provide naturally higher humidity than a dry bedroom or office.

Kitchens can also have higher humidity at certain times of the day, although temperature fluctuations, cooking heat, and limited light can make them less suitable for some plants.

When choosing a location, consider the entire environment rather than humidity alone.

A humid but dark room may be worse for a tropical plant than a moderately humid room with excellent indirect light.

6. Use a Glass Cabinet or Enclosed Plant Display

An enclosed cabinet can create a naturally humid microenvironment.

Because moisture released by the plants remains within the enclosure longer, humidity can rise considerably compared with an open shelf.

This approach can be especially useful for smaller tropical plants that require consistently humid conditions.

However, an enclosed environment needs careful management.

Too much moisture combined with stagnant air can encourage mold, fungal growth, and plant disease. Provide appropriate ventilation and monitor the conditions inside the cabinet.

A hygrometer is particularly useful for enclosed displays because humidity can change quickly.

7. Consider a Terrarium for Suitable Plants

Some tropical plants perform well in terrarium environments because the enclosed space retains moisture.

Terrariums can be especially suitable for smaller species that naturally prefer warm, humid conditions.

However, not every tropical houseplant belongs in a terrarium.

Large plants need more space, and some species require stronger airflow than a closed container can provide. Before placing a plant inside a terrarium, research its mature size, lighting requirements, watering needs, and tolerance for enclosed conditions.

8. Mist Carefully Rather Than Relying on Misting

Misting is one of the most commonly suggested ways to increase humidity for houseplants.

Although misting temporarily puts water droplets into the air and onto leaves, the effect on overall room humidity is usually short-lived. Once the water evaporates, the humidity returns toward its previous level.

That makes frequent misting a less reliable strategy than using a humidifier or creating a suitable microclimate.

Misting can also leave leaves wet for extended periods when airflow is poor.

For plants with delicate foliage, repeated wetting may create conditions that encourage leaf problems.

If you enjoy misting your plants, treat it as an occasional part of plant care rather than your primary humidity-control method.

9. Improve Air Circulation

Increasing humidity does not mean eliminating airflow.

In fact, good air circulation becomes increasingly important as humidity rises.

Warm, stagnant, humid air can create favorable conditions for fungal and bacterial problems. Plants also benefit from gentle air movement because it helps moisture evaporate from leaf surfaces.

A small fan can provide gentle circulation, but avoid blasting plants with strong airflow.

The goal is movement, not a constant stream of air directly across the leaves.

10. Check Humidity With a Hygrometer

A hygrometer is a simple device that measures relative humidity.

For plant owners, it can be much more useful than judging humidity by how the room feels.

Place the hygrometer near your plants, but avoid positioning it directly beside a humidifier outlet. You want to know the general conditions surrounding the plants rather than the concentrated moisture immediately coming from the machine.

If you have plants in several rooms, consider monitoring each area separately. One room may be significantly drier than another.

This can help explain why the same species performs well in one location but struggles in another.

11. Pay Attention to the Leaves

Your plants can provide useful clues about their environment.

Dry air may contribute to symptoms such as:

  • Brown or crispy leaf edges
  • Brown leaf tips
  • Curling leaves
  • Dry new growth
  • Leaves that appear unusually limp
  • Slower growth

However, these symptoms are not exclusive to low humidity.

Overwatering, underwatering, excessive fertilizer, root problems, pests, poor lighting, temperature stress, and natural leaf aging can all cause similar symptoms.

Before assuming humidity is the problem, consider the plant’s overall care routine.

12. Don’t Confuse Low Humidity With Underwatering

This is a common mistake among new houseplant owners.

A plant with brown leaf tips may appear to need more water, leading the owner to water more frequently. But if the soil remains wet for long periods, increasing watering can damage the roots instead of solving the original problem.

Humidity and soil moisture are two different aspects of plant care.

A plant can experience dry air while its potting mix is still adequately moist.

Always check the soil and the plant’s watering requirements before adding more water.

13. Use the Right Potting Mix

Humidity management works best when it is combined with healthy root conditions.

Tropical plants generally need a potting mix that retains enough moisture for their needs while still allowing excess water to drain away.

A compact, waterlogged growing medium can reduce oxygen around the roots and contribute to root problems.

The exact mix depends on the plant. Some tropical foliage plants prefer a chunky, airy mixture, while others have different requirements.

Good drainage is important regardless of whether the surrounding air is humid.

14. Keep Plants Away From Extreme Temperature Changes

Humidity and temperature work together.

A tropical plant may struggle when exposed to sudden temperature changes, cold drafts, or extreme heat.

For many tropical houseplants, a stable indoor environment is preferable to constantly moving the plant between dramatically different conditions.

Avoid placing sensitive plants directly beside cold windows during chilly weather or directly above heating equipment.

A comfortable room for you is often a reasonable starting point, but always check the specific requirements of the plant species.

15. Give Humidity-Loving Plants Their Own Space

If you have several different types of houseplants, they do not all need the same humidity level.

Instead of trying to make the entire home highly humid, consider creating a dedicated area for plants that need more moisture in the air.

For example, you could group humidity-loving tropical plants on one shelf and keep plants that tolerate drier conditions elsewhere.

This makes environmental control easier and prevents you from unnecessarily increasing humidity throughout your entire home.

Common Mistakes When Increasing Humidity

Increasing humidity sounds straightforward, but several mistakes can create new problems.

Making the Room Too Humid

More humidity is not automatically better.

Extremely humid conditions combined with poor ventilation can encourage mold, fungal problems, and other issues.

The goal is an appropriate, stable environment rather than maximum humidity.

Keeping Leaves Constantly Wet

Tropical plants enjoy humid air, but that does not mean their leaves should remain wet all day.

Wet foliage combined with poor air movement can create problems.

Ignoring Ventilation

A sealed room with high humidity and little airflow can become uncomfortable for both plants and people.

Use gentle air circulation when needed.

Overwatering

Increasing humidity does not mean watering more frequently.

Always distinguish between moisture in the air and moisture in the soil.

Moving Plants Too Frequently

Plants need time to adjust to their environment.

Instead of constantly moving a struggling plant from one location to another, make one change at a time and observe how the plant responds.

Which Tropical Houseplants Benefit From Higher Humidity?

Many tropical houseplants can appreciate increased humidity, but some are particularly associated with humid growing conditions.

Examples include:

  • Calatheas
  • Marantas
  • Ferns
  • Anthuriums
  • Alocasias
  • Certain orchids
  • Some tropical palms
  • Many aroids

Individual plants can still vary considerably. A particular species may tolerate ordinary household conditions better than another plant from the same general group.

Research the specific plant rather than relying solely on its classification as a “tropical” houseplant.

How to Create a Simple Humidity Station

You do not need an elaborate indoor greenhouse to create a better environment for tropical plants.

A simple setup could include:

  1. A group of tropical plants placed together.
  2. A digital hygrometer for monitoring humidity.
  3. A humidifier positioned nearby but not blowing directly onto the plants.
  4. A small fan providing gentle air circulation.
  5. Plants positioned away from air-conditioning vents and strong drafts.
  6. Pots with proper drainage and an appropriate growing medium.

This setup gives you several ways to manage the environment without depending on a single technique.

How Long Does It Take to See Results?

The amount of time required depends on the plant and the underlying problem.

If dry air is contributing to crispy new growth, improving the environment may help prevent additional damage as new leaves develop. Existing brown areas, however, generally will not turn green again.

This is important when evaluating whether your humidity adjustments are working.

Instead of expecting damaged leaves to recover, watch for healthier new growth, improved leaf texture, and fewer signs of stress.

Plant care is often about observing what happens over several weeks rather than judging the results after one day.

A Practical Humidity Routine for Tropical Houseplants

A simple routine can make humidity management much easier.

Every Few Days

Check the plants for signs of dry or damaged foliage. Look at the soil as well, since watering should be based on the plant’s requirements rather than humidity alone.

Weekly

Check your hygrometer and inspect the area around your plants.

Make sure the humidifier is clean, the plants have adequate airflow, and no leaves are pressed against one another for extended periods.

Monthly

Evaluate whether your current setup is actually helping.

If certain plants continue developing dry leaf edges, reconsider their lighting, watering, root health, temperature, and humidity rather than automatically increasing moisture.

source: Balcony Garden Web

The Best Way to Increase Humidity for Tropical Houseplants

There is no single humidity trick that works for every home or every plant.

For most indoor gardeners, the most practical approach is a combination of methods. A humidifier can provide consistent moisture to the air, grouping plants can create a small microclimate, and moving plants away from drying drafts can prevent unnecessary moisture loss.

Humidity trays and occasional misting may have limited benefits, while enclosed cabinets and terrariums can provide much stronger humidity for plants that are suited to those environments.

Most importantly, remember that humidity is only one part of successful tropical plant care. Proper lighting, watering, drainage, nutrition, temperature, and airflow all work together.

When those factors are balanced, tropical houseplants have a much better opportunity to produce healthy leaves and steady new growth. Rather than trying to recreate a rainforest indoors, focus on creating a stable environment that matches the needs of the plants you actually grow.

The written content on this page was generated by ChatGPT.

How to Repot Houseplants Without Stressing Them

Repotting a houseplant can feel like a simple job: find a bigger pot, add some fresh soil, move the plant, and give it water. In reality, the process can be a little more delicate. A plant that has spent months or years becoming comfortable in its container may react poorly if its roots are handled roughly, its new pot is too large, or its growing conditions suddenly change.

The good news is that repotting houseplants does not have to be stressful for the plant. With the right timing, pot size, soil, and technique, you can give your plant more room to grow while keeping root disturbance to a minimum.

Repotting is also about more than making a plant look better in a new container. Over time, potting mix can break down and become compacted, while roots may eventually fill much of the available space. Fresh growing media can improve the environment around the roots, while a properly sized container gives them room to continue developing.

How to Repot Houseplants Without Stressing Them
image generated using Gemini

Why Do Houseplants Need to Be Repotted?

Houseplants live in a limited environment. Unlike plants growing directly in the ground, their roots cannot continue expanding indefinitely. Eventually, the available space, nutrients, and structure of the potting mix can become limiting.

Some plants may need repotting every couple of years, while slower-growing plants can remain in the same container for much longer. There is no universal schedule that works for every houseplant.

Instead of repotting simply because a certain amount of time has passed, pay attention to what the plant is telling you.

Common signs that a houseplant may need repotting include:

  • Roots growing through the drainage holes
  • Roots circling tightly around the inside of the pot
  • Water running through the pot unusually quickly
  • Soil that has become compacted or difficult to wet
  • Noticeably slower growth
  • A plant becoming unstable or top-heavy
  • The container becoming crowded with roots
  • Potting mix that has significantly broken down
  • A container that has cracked or warped because of expanding roots

Roots emerging from drainage holes do not automatically mean that a plant is in serious trouble. However, when combined with other signs of root congestion, they can indicate that the plant would benefit from more room.

Should You Repot a Houseplant That Looks Healthy?

Not necessarily.

One of the easiest ways to stress a houseplant is to repot it when there is no real reason to do so. Some plants actually prefer being somewhat root-bound and can remain healthy in the same container for years.

Before reaching for a new pot, take a moment to inspect the plant.

If it is producing healthy new growth, the soil is functioning well, water is draining normally, and the roots are not severely crowded, there may be no need to disturb it.

In some cases, replacing a portion of the old potting mix or adding fresh mix around the existing rootball can be enough.

The goal is not to repot as often as possible. The goal is to create conditions where the roots have adequate space, oxygen, moisture, and nutrients.

When Is the Best Time to Repot Houseplants?

For many houseplants, spring is an excellent time to repot because plants are entering a period of more active growth. This gives them an opportunity to recover from root disturbance and establish themselves in their new container.

Early summer can also work for many plants.

That does not mean you can never repot during another season. A plant with severe root problems, badly degraded soil, pests, or a damaged container may need attention regardless of the calendar.

However, if the plant is healthy and you are simply planning routine maintenance, working during an active growing period is generally the gentler choice.

Avoid repotting simply because you are eager to give a plant a new look. A healthy plant in a suitable pot is often better left alone than moved unnecessarily.

How to Choose the Right New Pot

Choosing the correct container is one of the most important parts of successful repotting.

A common mistake is assuming that a much larger pot is better because the plant will have more room to grow.

It sounds logical, but too much extra potting mix can remain wet for an extended period. Excess moisture around the roots can increase the risk of root problems. Both the RHS and University of Minnesota Extension recommend moving houseplants into only a moderately larger container rather than making a dramatic jump in pot size.

As a general rule, choose a container that is only a few inches wider than the current one, depending on the plant and its root system.

For example, if your plant is currently growing in a 6-inch pot, moving it into an 8-inch pot may be more appropriate than immediately placing it into a 12-inch container.

The exact size should depend on the plant, its rootball, growth rate, and moisture requirements.

Always Look for Drainage Holes

A decorative container may look beautiful, but it should not become a stagnant pool for your plant’s roots.

Choose a pot with adequate drainage holes so excess water can escape. Good drainage helps prevent roots from sitting in saturated growing media for extended periods.

If you prefer using a decorative cachepot without drainage, keep the plant in a separate nursery pot with drainage and place that pot inside the decorative container.

Just remember to empty accumulated water rather than allowing the plant to sit in it.

Choosing the Right Potting Mix

Do not automatically use ordinary garden soil for your houseplants.

Indoor plants generally do better with a potting mix formulated for container growing. The ideal mix depends on the species.

A tropical foliage plant may appreciate a mix that holds some moisture while still allowing plenty of air around the roots. Succulents and cacti generally require much sharper drainage. Orchids need a completely different type of growing medium.

Consider the natural growing conditions of your particular plant before choosing the mix.

For general houseplants, look for a quality indoor potting mix that provides a balance between moisture retention, drainage, and aeration.

If the plant is particularly sensitive to wet roots, a mix amended with appropriate materials such as perlite, bark, or other components may improve drainage.

There is no single “best potting soil” for every houseplant.

Gather Everything Before You Start

Repotting is easier when everything is ready before the plant comes out of its old container.

You may need:

  • A clean new pot
  • Fresh potting mix
  • A small scoop or trowel
  • Clean scissors or pruning shears
  • A clean work surface
  • Water
  • Newspaper or a tray to contain loose soil

If you are reusing an old container, clean it thoroughly first. This gives you an opportunity to remove old soil and debris before introducing the plant to its new environment.

Having everything within reach also means the plant spends less time sitting exposed with its roots out of the container.

Water the Plant Before Repotting

Whether you should water immediately before repotting depends somewhat on the plant and condition of the soil.

You generally want the rootball to hold together well enough to handle, but you do not want to work with a container that is dripping wet.

A plant that is extremely dry may have a rootball that crumbles easily when removed. On the other hand, excessively wet soil can become heavy and difficult to work with.

The objective is manageable, slightly moist growing media rather than a saturated rootball.

Step 1: Prepare the New Container

Place a small amount of fresh potting mix in the bottom of the new container.

Do not fill the entire pot yet.

You want enough mix so that, once the plant is positioned inside, the top of the rootball sits at an appropriate level below the rim.

Avoid burying the plant deeper than it was previously growing. The base of the stem should generally remain at a similar level to its original planting depth.

Step 2: Remove the Plant Carefully

This is where many people unintentionally cause damage.

Do not grab the leaves and pull.

Instead, support the plant and gently work the old container away from the rootball. If the plant is difficult to remove, tilt the container sideways and carefully ease the rootball out.

For stubborn plants, gently squeezing a flexible plastic pot can help loosen the rootball.

The key is patience.

If the roots are tightly attached to the inside of the container, forcing the plant out can tear delicate roots. Take your time rather than trying to complete the job as quickly as possible.

Step 3: Examine the Roots

Once the plant is out, take a look at the roots.

Healthy roots vary in appearance depending on the species. They may be white, cream, tan, or another normal color.

What you are looking for is excessive congestion, damaged tissue, or obvious signs of decay.

If roots are circling densely around the outside of the rootball, gently loosen some of them with your fingers.

You do not need to completely tear the rootball apart.

In fact, aggressive root manipulation can create unnecessary stress.

The goal is simply to encourage the roots to move outward into the fresh growing medium.

Should You Cut the Roots When Repotting?

Most houseplants do not need extensive root pruning during an ordinary repot.

If the plant is simply being moved into a slightly larger container, gentle loosening may be enough.

Remove roots that are clearly dead, mushy, or rotten using clean scissors or pruning shears. Avoid cutting healthy roots simply because they are visible.

Root pruning can be appropriate in some situations, particularly when a plant must remain in the same-sized container. However, it should be approached carefully because removing too much of the root system can add unnecessary stress.

For a typical houseplant that is being moved into a slightly larger pot, less intervention is usually better.

Step 4: Position the Plant

Place the rootball into the new container.

Check the height before adding more soil.

The plant should not be sitting so low that the stem is buried beneath a thick layer of fresh potting mix. At the same time, you do not want the rootball sitting so high that the roots are exposed.

Once the height looks right, begin filling around the sides with fresh potting mix.

Work gradually.

Add some mix, gently settle it around the rootball, and continue until the empty spaces have been filled.

There is no need to pack the soil down aggressively.

Roots need access to air as well as water, and excessively compacted growing media can interfere with healthy root conditions.

Step 5: Water Thoroughly

After repotting, water the plant thoroughly so the new potting mix becomes evenly moist.

Continue until water begins to come out through the drainage holes. This helps settle the growing medium around the roots.

Allow the excess water to drain completely.

Do not leave the container sitting in a saucer filled with water.

Afterward, return the plant to an appropriate location based on its normal light requirements.

Don’t Immediately Fertilize

Fresh potting mix may already contain nutrients, depending on the product.

There is usually no reason to rush into heavy fertilization immediately after repotting. The plant has just experienced physical disturbance, and its priority is adjusting to its new environment.

Give it some time to settle.

Once you see signs of renewed growth, resume your normal feeding routine according to the plant’s needs and the instructions for your fertilizer.

Give Your Plant a Recovery Period

A newly repotted plant may not look dramatically different right away.

It might even appear slightly tired for a few days.

That does not necessarily mean something went wrong.

Moving a plant involves some degree of root disturbance, even when the process is done carefully. During the recovery period, avoid making several other major changes at the same time.

For example, there is usually little benefit in repotting a plant and immediately moving it to a completely different lighting environment, drastically changing its watering routine, and heavily pruning it.

Give the plant time to adjust.

Keep its lighting conditions appropriate, monitor moisture carefully, and avoid unnecessary handling.

How Much Should You Water After Repotting?

One of the biggest mistakes after repotting is assuming that a plant needs frequent watering because it has fresh soil.

It doesn’t.

In fact, a larger container with fresh potting mix may retain moisture differently from the old container.

Check the plant and growing medium rather than following a rigid watering schedule.

Some plants prefer to dry somewhat between waterings, while others prefer more consistent moisture.

The important thing is to understand the needs of the individual plant.

Remember that drainage is essential because roots require oxygen. When growing media remains saturated for long periods, air spaces can become filled with water, creating unfavorable conditions for roots.

Signs Your Plant Is Stressed After Repotting

Even a carefully repotted houseplant may show temporary signs of stress.

You might notice:

  • Slight leaf drooping
  • A temporary slowdown in growth
  • A few older leaves yellowing
  • Leaves appearing less firm than usual
  • Minor changes in appearance

These symptoms should be monitored rather than immediately treated with more water, fertilizer, or additional repotting.

Overreacting can sometimes make the situation worse.

For example, if a plant droops after repotting, automatically adding more water may create a second problem if the soil is already moist.

Instead, check the growing medium and the plant’s environment first.

What If the Leaves Start Turning Yellow?

Yellow leaves after repotting can have several possible causes.

The plant may be experiencing temporary stress, but yellowing can also be associated with excessive moisture, poor drainage, insufficient light, nutrient issues, or other growing conditions.

Look at the whole plant rather than diagnosing the problem from one leaf.

If the soil remains wet for an unusually long time, check the drainage and pot size. A container that is substantially larger than the rootball can hold more unused moisture, increasing the risk of root problems.

If the plant otherwise looks healthy and only an older leaf has yellowed, there may be no reason for alarm.

Common Repotting Mistakes to Avoid

Using a Pot That Is Too Large

Bigger is not always better.

An oversized container can contain a large volume of potting mix that remains wet around a relatively small root system.

Choose a modest increase in pot size instead.

Using a Container Without Drainage

A beautiful pot is not worth sacrificing healthy roots.

If there is no drainage hole, use it as an outer decorative container and keep the plant in a suitable inner pot.

Breaking Apart the Entire Rootball

Some gardeners believe they need to completely remove all old soil before repotting.

That is not always necessary.

For many healthy houseplants, preserving much of the existing rootball while gently loosening crowded roots is a less disruptive approach.

Burying the Stem Too Deeply

Adding too much soil around the base of the plant can create problems.

Try to maintain approximately the same planting depth the plant had before repotting.

Compressing the Soil Too Firmly

Fresh potting mix should provide support without becoming a hard, compact mass.

Settle it gently around the rootball instead of crushing it down.

Fertilizing Too Aggressively

A recently disturbed plant does not need a heavy dose of fertilizer to “recover faster.”

Let the plant settle before returning to a regular feeding routine.

Repotting Every Plant on the Same Schedule

Different plants grow at different speeds and have different root systems.

A fast-growing tropical plant may need more frequent attention than a slow-growing succulent.

Learn to read the plant rather than relying entirely on a calendar.

Can You Repot a Plant Into the Same Pot?

Yes.

Repotting does not always mean upgrading to a larger container.

If the current pot is appropriate in size but the potting mix has deteriorated, you may be able to refresh the growing medium and return the plant to the same container.

This can be especially useful when a mature plant has reached the size you want and you do not want it to become larger.

In some situations, careful root pruning combined with fresh growing media can allow a plant to remain in the same-sized container. However, the amount of root removal should be limited and appropriate for the particular plant.

How Often Should You Repot Houseplants?

There is no universal repotting schedule.

Some houseplants may be happy in the same container for several years, while rapidly growing plants may need attention sooner.

The RHS notes that many container plants can benefit from repotting every few years, but the plant’s vigor, growing medium, and container size all influence how frequently repotting is necessary.

Instead of marking a specific date on your calendar, make root inspection part of your regular plant-care routine.

Look underneath the pot.

Pay attention to how quickly the soil dries.

Watch for changes in growth.

These clues are often more useful than a fixed schedule.

Special Considerations for Succulents and Cacti

Succulents and cacti generally have different watering and drainage requirements from many tropical houseplants.

When repotting them, use a growing medium that drains readily and avoid putting them into an oversized container.

Because these plants are adapted to periods of dryness, keeping them in a large volume of damp soil can create unfavorable conditions around their roots.

Allow the growing medium and watering routine to reflect the plant’s specific needs rather than treating every houseplant the same way.

Special Considerations for Tropical Houseplants

Plants such as monstera, philodendrons, pothos, and other tropical foliage plants may appreciate a growing medium that retains some moisture while still providing good aeration and drainage.

Many tropical plants also respond well to repotting during active growth.

However, even vigorous tropical plants can experience stress if their roots are aggressively disturbed.

When possible, preserve the healthy rootball and make the transition gradually.

What to Do With a Root-Bound Houseplant

A severely root-bound plant may have roots circling the entire rootball and filling most of the container.

If the roots are extremely congested, simply dropping the rootball into a larger pot may not solve the underlying problem.

Gently tease apart some of the outer roots.

If necessary, carefully trim severely congested or damaged sections.

Then move the plant into an appropriately sized container.

Avoid jumping from a tiny pot into an enormous one. The objective is to give the root system usable space, not surround it with a huge amount of unused wet soil.

Repotting Doesn’t Have to Be a Dramatic Event

The idea of repotting can make new plant owners nervous because the roots are hidden most of the time.

Once the plant comes out of its container, it can be tempting to start cutting, pulling, cleaning, and rearranging everything.

Resist that urge.

A gentle approach is usually the better approach.

Remove the plant carefully. Inspect the roots. Remove obvious damaged material. Loosen severe congestion where appropriate. Give it fresh growing media. Use a reasonably sized container. Water thoroughly and let it drain.

Then leave the plant alone to settle.

That is often all it needs.

A Simple Houseplant Repotting Checklist

Before you begin, ask yourself:

Does the plant actually need repotting?

Check the roots, soil, drainage, and growth.

Is the new pot only moderately larger?

Avoid excessive extra space around a small rootball.

Does the container have drainage holes?

Good drainage is essential for healthy roots.

Is the potting mix appropriate for the plant?

A cactus does not have the same requirements as a tropical foliage plant.

Can you remove the plant without pulling aggressively?

Take your time.

Are the roots healthy?

Remove only damaged or clearly unhealthy roots when necessary.

Is the plant being planted at the correct depth?

Do not bury the stem unnecessarily.

Will you allow the excess water to drain?

Never leave the plant sitting in standing water.

Can you give the plant a quiet recovery period?

Avoid making several major changes at once.

source: Washington Post

Final Thoughts on Stress-Free Houseplant Repotting

Repotting a houseplant is less about giving it the biggest possible container and more about creating a healthy environment for its roots.

The most important steps are surprisingly simple: repot when the plant needs it, choose a suitable pot, use appropriate growing media, handle the roots gently, provide drainage, and avoid overwatering afterward.

A little patience goes a long way.

Before reaching for the largest pot you can find, inspect the root system. Before cutting roots, decide whether cutting is actually necessary. Before watering again, check whether the soil is already moist.

When you approach repotting as a careful transition rather than a complete overhaul, your houseplants have a much better chance of settling in quickly and continuing healthy growth.

A thriving indoor garden is built through small, consistent decisions. Giving roots the right amount of space, moisture, air, and fresh growing media is one of the simplest ways to keep those plants growing beautifully for years.

The written content on this page was generated by ChatGPT.

The Best Fertilizer Schedule for Garden Plants

A thriving garden rarely happens by accident. Healthy plants need sunlight, water, good soil, and the right nutrients at the right time. Fertilizer can help provide those nutrients, but knowing when to fertilize garden plants is just as important as knowing which fertilizer to use.

One of the most common gardening mistakes is assuming that more fertilizer means faster or healthier growth. In reality, applying too much fertilizer can damage roots, encourage weak growth, contribute to pest and disease problems, and allow excess nutrients to move into waterways. Extension specialists generally recommend basing fertilizer applications on soil-test results, plant requirements, and the stage of growth rather than following a one-size-fits-all schedule.

The good news is that creating a fertilizer schedule does not have to be complicated. Once you understand how plants use nutrients throughout the growing season, you can build a simple routine that works for vegetables, flowers, herbs, and many other garden plants.

The Best Fertilizer Schedule for Garden Plants
image generated by Gemini

Why Fertilizer Timing Matters

Plants do not need the same amount of nutrients throughout their entire life cycle.

A newly planted seedling has different requirements from a mature tomato plant loaded with fruit. A leafy vegetable may need more nitrogen during active leaf production, while a flowering plant may have different nutrient demands as it develops buds and flowers.

Nitrogen, phosphorus, and potassium are the three nutrients most commonly listed on fertilizer packages. Nitrogen supports overall plant growth and green foliage, phosphorus plays important roles in root development and reproductive growth, and potassium is involved in numerous plant processes.

This is why fertilizer should be timed around periods when plants can actually use the nutrients. Applying fertilizer when plants are dormant or when growing conditions are poor is unlikely to solve the underlying problem.

For many garden plants, the most important periods are:

  • Before or around planting
  • Early active growth
  • The period before flowering
  • Flowering and fruit development
  • Additional growth periods for heavy-feeding crops

The exact schedule depends on the plant, soil, fertilizer type, climate, and growing conditions.

Start With a Soil Test

Before creating a detailed fertilizer schedule, find out what your soil already contains.

A soil test can reveal nutrient levels and other soil characteristics that influence plant growth. It can also prevent you from adding nutrients that are already abundant. The Philippine Department of Agriculture’s Bureau of Soils and Water Management, for example, provides fertilizer recommendations based on soil-test results, including the appropriate amount, type, and timing of fertilizer.

This is particularly important with phosphorus. Some soils can already contain adequate or excessive phosphorus, making repeated applications unnecessary.

A soil test can help answer questions such as:

  • Does the soil actually need fertilizer?
  • Is nitrogen deficient?
  • Does the garden need additional phosphorus?
  • Is potassium already sufficient?
  • Does the soil need another type of amendment?
  • How much fertilizer should be applied?

Without a soil test, gardeners are often guessing.

Understanding the N-P-K Numbers

Look at almost any bag of garden fertilizer and you will see three numbers, such as 10-10-10, 5-10-5, or 10-2-8.

These numbers represent the fertilizer’s nitrogen, phosphorus, and potassium analysis, in that order. More precisely, the second and third numbers refer to phosphate and potash as listed on fertilizer labels.

For example, a 10-5-5 fertilizer contains:

  • 10% nitrogen
  • 5% phosphate
  • 5% potash

The numbers do not automatically tell you which fertilizer is best for your garden. The correct choice depends on what your plants need and what is already available in the soil.

A common mistake is choosing fertilizer simply because it has a high number. A higher number is not necessarily better.

A Simple Seasonal Fertilizer Schedule

For many home gardens, the easiest approach is to think of fertilizer applications in stages rather than trying to fertilize every plant on the same day.

Early Spring: Prepare the Garden

For gardens in climates with a spring growing season, early spring is an important time to assess the soil and prepare planting areas.

Before applying fertilizer:

  1. Remove weeds and old plant debris.
  2. Test the soil if a recent test is unavailable.
  3. Add compost or other recommended amendments when appropriate.
  4. Choose fertilizer based on soil and crop requirements.
  5. Apply only the recommended amount.

Fertilizer can be incorporated into the soil before planting when appropriate. Broadcasting fertilizer before planting and mixing it into the upper few inches of soil is one established application method for home gardens.

Do not automatically fertilize simply because spring has arrived. If soil fertility is already adequate, additional fertilizer may provide little benefit.

At Planting Time: Give Young Plants a Good Start

Seedlings and transplants can be vulnerable during the transition into the garden.

Some vegetables benefit from fertilizer applied around planting, while others may require little additional feeding if the soil is already fertile.

Vegetable crops generally need nutrients during establishment and later during flowering and fruit production.

If you use a starter fertilizer, follow the product label carefully. Avoid placing concentrated fertilizer directly against roots or stems because excessive fertilizer near young roots can cause injury.

For transplants, some extension recommendations use a diluted water-soluble starter solution around the root zone. The specific formulation and rate should follow local recommendations and the product label.

Two to Four Weeks After Planting: Check Plant Growth

Instead of automatically applying another dose, inspect your plants.

Look for:

  • Strong new growth
  • Healthy leaf color
  • Normal flowering
  • Signs of nutrient deficiency
  • Signs of fertilizer injury
  • Poor growth caused by insects, disease, shade, drought, or excess moisture

Fertilizer is not a cure-all. If poor growth is caused by disease, pests, poor drainage, insufficient sunlight, or another environmental problem, adding fertilizer may not fix it.

This simple observation period can prevent unnecessary fertilizer applications.

Four to Six Weeks Into Active Growth: Consider Side-Dressing

Some vegetables benefit from additional nutrients during active growth.

This is where side-dressing can be useful. Instead of placing fertilizer directly against the plant, fertilizer is applied alongside the growing plants and then watered into the soil.

Side-dressing is particularly useful for crops with continuing nutrient demands and for sandy soils where nutrients can be lost more readily.

For example, tomatoes, peppers, and eggplants may receive additional fertilizer as they become established and begin producing fruit. University of Maryland Extension notes that fruiting vegetables such as tomatoes, peppers, and eggplants are often side-dressed when the first fruits begin forming.

Flowering and Fruit Production: Focus on Plant Needs

Once plants begin flowering or setting fruit, avoid assuming they automatically need a heavy dose of fertilizer.

Some vegetables have significant nutrient requirements during flowering and fruit production, but the correct nutrient balance depends on the crop and soil.

For example, applying excessive nitrogen to a fruiting plant can encourage abundant leafy growth when the gardener actually wants flowers and fruit.

This is why a fertilizer schedule should be considered a guide rather than a rigid calendar.

Late Growing Season: Know When to Stop

One of the easiest fertilizer mistakes to make is continuing to feed plants simply because they are still green.

As the growing season winds down, many plants need less fertilizer. Applying nitrogen late in the season can be particularly inefficient because plants may not be able to use it effectively before growth slows. Extension guidance recommends timing nutrients to periods of plant demand to improve nutrient use and reduce potential losses.

For perennial ornamental plants, fertilizer applications are generally concentrated during active growth rather than during winter dormancy.

Fertilizer Schedule for Common Garden Plants

There is no universal fertilizer schedule that works perfectly for every plant. However, a general framework can make garden planning easier.

Tomatoes

Tomatoes are relatively nutrient-demanding plants and can benefit from feeding during establishment and fruit production.

A practical approach is:

  • Apply soil amendments and fertilizer according to soil-test recommendations before planting.
  • Provide appropriate nutrition as plants become established.
  • Consider side-dressing during active growth.
  • Pay attention to the first flowers and developing fruit.
  • Avoid excessive nitrogen once the plants are heavily focused on flowering and fruiting.

Tomatoes should not be fertilized according to a generic schedule if a soil test indicates that certain nutrients are already plentiful.

Peppers

Peppers can follow a schedule similar to tomatoes.

Provide nutrients during establishment, then monitor plants as they begin flowering and producing fruit. Additional fertilizer may be appropriate during active production, particularly when soil fertility is limited.

Avoid heavy applications simply to encourage larger plants. A healthy pepper plant needs balanced nutrition, not unlimited fertilizer.

Leafy Greens

Lettuce, spinach, kale, and similar crops produce the part of the plant that gardeners eat as leaves.

Nitrogen is especially important for vegetative growth, but the amount required varies by crop and soil. Some leafy vegetables can perform well with fewer fertilizer applications than heavy-feeding crops.

For these plants, building fertile soil with organic matter and applying fertilizer according to soil-test recommendations can be more effective than repeatedly feeding throughout the season.

Root Vegetables

Carrots, radishes, beets, and similar crops need adequate nutrition, but excessive nitrogen can encourage leafy growth at the expense of the desired underground crop.

Prepare the soil properly before planting and avoid automatically adding high-nitrogen fertilizer throughout the season.

Good soil structure is also important for root crops because compacted or poorly prepared soil can interfere with root development.

Herbs

Many culinary herbs do not require aggressive fertilization.

Basil and other fast-growing annual herbs may appreciate additional nutrients during active growth, while established perennial herbs such as rosemary can often be grown with relatively modest fertilizer inputs.

Overfertilizing herbs can produce excessive soft growth and may not necessarily improve flavor or plant quality.

Flowering Plants

Annual flowers may need regular feeding because they grow rapidly and produce flowers over an extended period.

Perennial flowers generally have different requirements. Many established perennials can perform well without frequent fertilizer if they are growing in healthy soil. University of Maryland Extension notes that many trees, shrubs, and perennials grow well without supplemental fertilizer.

For flowering plants, concentrate on maintaining healthy soil and providing nutrients when plants are actively growing rather than relying on heavy fertilizer applications.

Organic vs. Synthetic Fertilizer

Both organic and synthetic fertilizers can supply nutrients to plants.

The main difference for scheduling is often how quickly nutrients become available.

Many inorganic fertilizers can make nutrients available relatively quickly, while organic fertilizers tend to release nutrients more slowly. The release rate of organic fertilizers also depends on the material, temperature, soil moisture, and microbial activity.

This means an organic fertilizer may need to be incorporated earlier to provide nutrients when plants need them.

Examples of organic nutrient sources include:

  • Compost
  • Well-aged manure
  • Bone meal
  • Plant-based fertilizers
  • Other approved organic nutrient products

Synthetic fertilizers can also be useful when a specific nutrient deficiency needs to be corrected efficiently.

The important question is not simply whether a fertilizer is organic or synthetic. The bigger questions are what nutrients does it provide, how much is needed, and when can the plant use them?

How Often Should You Fertilize Garden Plants?

There is no single answer.

Some container plants may need more frequent feeding because repeated watering can move nutrients through the growing medium. For example, University of California Cooperative Extension guidance for potted plants recommends water-soluble fertilizer at intervals of roughly two to four weeks, following the product label.

Garden plants growing in the ground are different.

A vegetable garden may receive fertilizer before planting and one or more side-dressings during the growing season. Established trees and shrubs may need little or no supplemental fertilizer if soil fertility is adequate.

The plant, soil, fertilizer formulation, rainfall, irrigation, and growing conditions all matter.

Signs You May Be Overfertilizing

More fertilizer is not necessarily better.

Too much fertilizer can cause:

  • Leaf burn
  • Root damage
  • Excessively rapid growth
  • Weak or overly soft plant growth
  • Increased pest or disease problems
  • Nutrient imbalances
  • Salt buildup in containers
  • Nutrient runoff into waterways

University of Maryland Extension specifically warns that excessive fertilizer use can encourage weak, succulent growth and contribute to pest, disease, and water-pollution problems.

If a plant looks unhealthy after fertilization, do not immediately add more fertilizer. Consider whether the problem could be caused by excess nutrients, watering, pests, disease, temperature, sunlight, or soil conditions.

How to Apply Fertilizer Safely

Always read the fertilizer label before applying a product.

Measure the recommended amount rather than estimating with a handful. Keep granular fertilizer away from direct contact with stems and leaves unless the product specifically indicates otherwise.

Water fertilizer into the soil when the label recommends it.

When applying fertilizer around established plants, distributing it around the root zone rather than concentrating it directly against the stem can reduce the risk of injury. Side-dressing is one common technique for garden vegetables.

Also avoid fertilizing immediately before heavy rainfall when runoff or nutrient loss is likely.

A Practical Monthly Fertilizer Calendar

For gardeners who want something simple, the following framework can serve as a starting point for a seasonal vegetable garden:

Month 1 — Planning and Soil Preparation

Test the soil and review previous garden performance. Add compost or other amendments when needed. Choose fertilizer based on the soil test and crops you plan to grow.

Month 2 — Planting

Apply fertilizer according to crop recommendations and the product label. Give seedlings and transplants time to establish instead of immediately applying repeated doses.

Month 3 — Early Growth

Monitor plant color and growth. If a crop requires additional nutrition, consider an appropriate side-dressing.

Month 4 — Flowering and Fruit Development

Pay close attention to tomatoes, peppers, squash, cucumbers, and other fruiting crops. Apply additional nutrients only when appropriate for the crop and soil.

Month 5 — Continued Harvest

Heavy-feeding crops may require another application during continued production. Avoid applying fertilizer simply because the calendar says it is time.

Month 6 — Season’s End

Reduce or stop fertilizer applications as plants approach dormancy or the end of their productive cycle. Remove unhealthy plant material and begin preparing the garden for the next season.

This calendar is intentionally flexible because fertilizer requirements vary considerably from one garden to another.

What About Compost?

Compost is not always a replacement for fertilizer, but it can be an important part of a healthy garden soil strategy.

Adding organic matter can improve soil structure and contribute nutrients. As organic matter increases, the amount of supplemental fertilizer needed may decrease.

Instead of thinking of compost and fertilizer as competing choices, gardeners can use them for different purposes.

Compost can help improve the overall soil environment, while fertilizer can supply specific nutrients when a deficiency or crop requirement calls for them.

Common Fertilizer Mistakes to Avoid

Fertilizing on a Fixed Calendar

A calendar is useful, but plants do not know what day it is.

Use the calendar as a reminder to inspect the garden rather than as an automatic instruction to fertilize.

Using the Same Fertilizer Everywhere

A tomato plant, lawn, rose bush, herb, and young seedling do not necessarily have identical nutrient requirements.

Choose fertilizer based on the plant and soil.

Ignoring Soil Tests

Without a soil test, you may add nutrients the garden does not need.

Applying Too Much

Excess fertilizer can damage plants and create environmental problems.

Fertilizing Stressed Plants Automatically

A yellow leaf does not always mean nitrogen deficiency. Poor drainage, pests, disease, root damage, insufficient light, and other problems can produce similar symptoms.

Applying Fertilizer Too Close to the Stem

Concentrated fertilizer can injure plant tissue and roots.

Forgetting About Water

Plants need adequate moisture to absorb nutrients. Fertilizing a severely drought-stressed plant is not a substitute for correcting its water needs.

source: @ChrisTheAmateurGardener

The Best Fertilizer Schedule Is Based on the Plant, Not the Calendar

The most effective fertilizer schedule is not necessarily the one with the most applications.

Healthy garden fertilization is about matching nutrients to plant demand.

Start with the soil. Understand the N-P-K numbers. Feed plants during periods of active growth when they can make use of the nutrients. Give additional attention to heavy-feeding vegetables during flowering and fruit production. Reduce applications as plants enter dormancy or finish their productive season.

Most importantly, observe your garden.

A thriving garden gives you plenty of clues. Strong new growth, healthy leaves, good flowering, and productive plants are signs that your growing conditions are working. If plants are struggling, investigate the underlying cause before reaching for another bag of fertilizer.

By combining soil testing, thoughtful fertilizer selection, proper application, and well-timed feeding, gardeners can build a nutrient-management routine that supports healthier plants without wasting fertilizer. The goal is not to fertilize more often. The goal is to give plants what they need, when they need it.

The written content on this page was generated by ChatGPT.

How to Identify and Treat Common Plant Diseases

A lush, productive garden doesn’t happen by accident. Healthy soil, proper watering, and regular maintenance all play important roles, but even experienced gardeners eventually encounter plant diseases. One week your tomatoes look vibrant, and the next their leaves are covered with brown spots. Your roses may suddenly develop a white powdery coating, or your cucumbers may begin to wilt despite receiving plenty of water.

The good news is that most plant diseases can be controlled—and often prevented—if you know what signs to watch for. Early identification is the key to stopping diseases before they spread throughout your garden.

This guide explains how to recognize the most common plant diseases, understand what causes them, and use effective treatment methods that keep your plants thriving throughout the growing season.

How to Identify and Treat Common Plant Diseases

Why Plant Diseases Develop

Plant diseases are usually caused by one of four main factors:

  • Fungi
  • Bacteria
  • Viruses
  • Environmental stress

Fungal diseases account for the majority of problems home gardeners face. They spread through airborne spores, splashing water, contaminated soil, gardening tools, and even insects.

Environmental conditions also play a significant role. Warm temperatures, high humidity, overcrowded plants, poor airflow, and excessive watering create ideal conditions for disease development.

Healthy plants naturally resist disease better than stressed plants, making proper plant care your first line of defense.


Early Warning Signs of Plant Disease

Inspect your plants at least once each week. Catching symptoms early greatly increases the chances of successful treatment.

Watch for:

  • Yellowing leaves
  • Brown or black leaf spots
  • White powdery coatings
  • Wilting despite moist soil
  • Curling leaves
  • Stunted growth
  • Mushy stems
  • Discolored veins
  • Premature leaf drop
  • Mold or fuzzy growth
  • Rotten fruit
  • Dead branches

The sooner you identify unusual changes, the easier they are to manage.


Powdery Mildew

Powdery mildew is one of the easiest diseases to recognize because it leaves a white, flour-like coating across leaves, stems, and flower buds.

Common Plants Affected

  • Roses
  • Cucumbers
  • Squash
  • Pumpkins
  • Zinnias
  • Phlox
  • Bee balm

Symptoms

  • White powder on leaves
  • Distorted new growth
  • Yellow leaves
  • Reduced flowering
  • Early leaf drop

Causes

Powdery mildew prefers warm days and cool nights with high humidity. Unlike many fungal diseases, it doesn’t require wet leaves to spread.

Treatment

  • Remove infected leaves.
  • Increase spacing between plants.
  • Improve air circulation.
  • Avoid overhead watering.
  • Apply sulfur-based or neem oil fungicides if necessary.

Leaf Spot Diseases

Leaf spot refers to several fungal and bacterial diseases that create circular or irregular spots on foliage.

Symptoms

  • Brown spots
  • Black spots
  • Yellow halos around lesions
  • Dead leaf tissue
  • Premature leaf drop

Common Plants

  • Tomatoes
  • Roses
  • Peppers
  • Hydrangeas
  • Maple trees

Treatment

  • Remove affected foliage.
  • Water at the base of plants.
  • Apply mulch to reduce soil splash.
  • Use copper fungicides if the infection becomes widespread.

Root Rot

Root rot is often caused by overly wet soil and poor drainage.

Symptoms

  • Wilting
  • Yellow leaves
  • Soft stems
  • Stunted growth
  • Mushy roots
  • Foul odor from the soil

Many gardeners mistake root rot for drought and water even more, making the problem worse.

Treatment

  • Improve drainage.
  • Reduce watering.
  • Remove severely infected plants.
  • Replace contaminated soil if necessary.

Healthy roots should appear white and firm rather than brown and mushy.


Downy Mildew

Downy mildew thrives during cool, damp weather.

Symptoms

  • Yellow patches on upper leaves
  • Gray or purple fuzzy growth underneath leaves
  • Rapid leaf death

Common Plants

  • Basil
  • Grapes
  • Cucumbers
  • Spinach
  • Lettuce

Treatment

  • Remove infected leaves.
  • Increase airflow.
  • Water early in the day.
  • Apply appropriate fungicides when needed.

Rust Disease

Rust appears as orange, yellow, or reddish pustules on leaves.

Plants Frequently Affected

  • Hollyhocks
  • Roses
  • Beans
  • Daylilies

Symptoms

  • Orange spots
  • Yellow leaves
  • Leaf drop
  • Reduced vigor

Treatment

  • Remove infected foliage.
  • Improve plant spacing.
  • Avoid wetting leaves.
  • Dispose of infected debris away from compost piles.

Blight

Blight can quickly destroy vegetable gardens, especially tomatoes and potatoes.

Early Blight

Symptoms include:

  • Brown spots with concentric rings
  • Yellowing leaves
  • Stem lesions

Late Blight

Symptoms include:

  • Water-soaked leaves
  • Dark stems
  • Rapid plant collapse
  • Fruit rot

Treatment

  • Remove infected plants immediately.
  • Rotate crops yearly.
  • Avoid overhead irrigation.
  • Use disease-resistant varieties whenever possible.

Bacterial Wilt

Bacterial wilt blocks water movement inside plants.

Symptoms

  • Sudden wilting
  • Green leaves that quickly collapse
  • Plant death despite moist soil

Common Hosts

  • Cucumbers
  • Melons
  • Squash

Unfortunately, there is no cure once bacterial wilt develops.

Management

  • Remove infected plants.
  • Control cucumber beetles, which spread the bacteria.
  • Rotate crops.

Mosaic Viruses

Viruses create distinctive patterns on leaves.

Symptoms

  • Light and dark green mottling
  • Distorted leaves
  • Reduced fruit production
  • Slow growth

Common Plants

  • Tomatoes
  • Cucumbers
  • Peppers
  • Beans

Treatment

There is no treatment for plant viruses.

Remove infected plants immediately to prevent spread.

Control insects such as aphids that transmit viral diseases.


Anthracnose

Anthracnose affects many trees, shrubs, vegetables, and fruits.

Symptoms

  • Dark sunken lesions
  • Dead leaf edges
  • Twig dieback
  • Fruit blemishes

Treatment

  • Remove infected material.
  • Prune for better airflow.
  • Water carefully.
  • Apply preventive fungicides during wet seasons.

Gray Mold (Botrytis)

Gray mold commonly attacks flowers, berries, and vegetables.

Symptoms

  • Soft brown spots
  • Gray fuzzy mold
  • Flower blight
  • Fruit decay

Treatment

  • Remove infected tissue.
  • Improve ventilation.
  • Avoid excessive moisture.
  • Harvest ripe produce promptly.

Natural Disease Prevention Methods

Preventing disease is much easier than treating established infections.

Good gardening practices include:

  • Water deeply but less frequently.
  • Water at the soil level.
  • Space plants properly.
  • Rotate crops annually.
  • Keep weeds under control.
  • Remove dead leaves regularly.
  • Sterilize pruning tools.
  • Add compost to improve soil health.
  • Avoid over-fertilizing.
  • Plant disease-resistant varieties.

Healthy plants naturally resist infections more effectively.


The Importance of Good Air Circulation

Many fungal diseases thrive when leaves remain damp for extended periods.

To improve airflow:

  • Prune dense growth.
  • Avoid overcrowding.
  • Stake tomatoes.
  • Use trellises for climbing vegetables.
  • Remove lower leaves touching the soil.

Good airflow can significantly reduce disease pressure throughout the season.


Watering Mistakes That Encourage Disease

Improper watering is responsible for countless plant health problems.

Avoid:

  • Watering late in the evening
  • Constantly wet soil
  • Wetting foliage unnecessarily
  • Poor drainage
  • Shallow daily watering

Instead, water early in the morning so plants dry quickly after sunrise.


When Should You Use Fungicides?

Fungicides work best as preventative treatments rather than cures.

Consider using them when:

  • Disease appears every year.
  • Weather remains consistently wet.
  • Valuable plants are at risk.
  • Fungal infections begin spreading rapidly.

Always follow label directions carefully and avoid unnecessary applications.


Organic Disease Control Options

Many gardeners prefer environmentally friendly solutions.

Popular organic treatments include:

  • Neem oil
  • Copper fungicides
  • Sulfur sprays
  • Baking soda solutions
  • Compost tea
  • Beneficial microbes

Organic treatments work best alongside good gardening practices rather than as stand-alone solutions.


Cleaning Up After Disease

Proper cleanup prevents diseases from returning next season.

At the end of the growing season:

  • Remove infected plants.
  • Dispose of diseased material instead of composting it.
  • Clean tools with disinfectant.
  • Wash pots and containers.
  • Replace heavily contaminated mulch.
  • Rotate planting locations.

These simple steps interrupt disease life cycles.


Frequently Asked Questions

Can diseased plants recover?

Some fungal diseases can be managed if caught early, allowing plants to recover and continue producing. Viral infections, however, usually require removing the affected plant.

Should I remove infected leaves?

Yes. Removing diseased foliage helps reduce the spread of many fungal and bacterial diseases. Be sure to disinfect pruning tools afterward.

Is yellowing always caused by disease?

No. Yellow leaves can also result from nutrient deficiencies, drought, overwatering, root damage, or natural aging. Look for additional symptoms before diagnosing a disease.

Can plant diseases spread through gardening tools?

Absolutely. Pruners, shears, trowels, and even gloves can transfer pathogens from one plant to another if they are not cleaned regularly.

source: Next Level Gardening

Final Thoughts

Every successful gardener eventually encounters plant diseases, but they don’t have to spell disaster. Learning to recognize the early warning signs, understanding the causes behind common infections, and taking prompt action can save your flowers, vegetables, shrubs, and trees from serious damage.

The healthiest gardens are built on prevention. Proper watering, fertile soil, good airflow, crop rotation, and routine inspections create an environment where plants can flourish while diseases struggle to gain a foothold. By staying attentive and addressing small problems before they become widespread, you’ll enjoy stronger plants, higher yields, and a garden that remains vibrant throughout the growing season.

The written content on this page was generated by ChatGPT.

How to Save a Dying Plant: Common Causes, Proven Fixes, and Expert Tips for Bringing It Back to Life

There is something deeply satisfying about caring for a plant. Watching fresh leaves unfurl, flowers bloom, or vegetables ripen creates a sense of accomplishment that few hobbies can match. That is why it feels especially disappointing when a healthy-looking plant suddenly begins to wilt, develop yellow leaves, or stop growing altogether.

The good news is that a struggling plant is not always beyond saving. In fact, many plants recover remarkably well once the real problem is identified. A drooping stem or browning leaf is not necessarily a sign that your gardening efforts have failed. More often, it is the plant’s way of asking for different care.

Many gardeners make the mistake of reacting too quickly. A wilted plant gets more water. Yellow leaves lead to extra fertilizer. A slow-growing houseplant is moved from one location to another every few days. While these actions are usually well intentioned, they often make matters worse because the root cause has not been identified.

Learning to “read” your plants is one of the most valuable gardening skills you can develop. Leaves, stems, roots, flowers, and even the soil provide clues about what is happening beneath the surface. Once you know what those clues mean, reviving a declining plant becomes much easier.

This guide explores the most common reasons plants begin to fail, practical solutions that actually work, and preventative habits that help keep your indoor and outdoor plants thriving throughout the year.

How to Save a Dying Plant: Common Causes, Proven Fixes, and Expert Tips for Bringing It Back to Life

Is Your Plant Really Dying or Simply Stressed?

Before attempting to rescue a plant, determine whether it is experiencing temporary stress or irreversible damage.

Plants often react dramatically to changes in their environment. A sudden move, inconsistent watering, or a week of unusually hot weather can cause leaves to droop even though the plant remains perfectly healthy beneath the soil.

Look for these warning signs:

  • Leaves turning yellow
  • Brown or crispy leaf edges
  • Wilting despite moist soil
  • Dry, brittle stems
  • Leaf drop
  • Black spots on foliage
  • Mushy stems
  • Stunted growth
  • Mold developing on the soil
  • Roots growing through drainage holes

A plant displaying several of these symptoms may still recover if the underlying issue is corrected early.


Step One: Examine the Entire Plant

Instead of immediately watering or fertilizing, spend a few minutes inspecting the entire plant.

Check the following:

  • Soil moisture
  • Leaf color
  • Stem firmness
  • Root condition
  • Presence of insects
  • Sunlight exposure
  • Drainage
  • Pot size

Many plant problems become obvious after a careful inspection.

For example, yellow leaves with soggy soil usually point toward overwatering, while crispy brown leaves paired with dry soil often indicate dehydration.


Common Cause #1: Overwatering

Ironically, giving plants too much attention is one of the biggest reasons they decline.

Roots require both water and oxygen. When soil remains saturated for days, oxygen disappears, causing roots to suffocate and eventually rot.

Warning Signs

  • Yellow leaves
  • Leaves falling off
  • Mushy stems
  • Soft trunk
  • Foul smell from soil
  • Mold on the surface
  • Fungus gnats flying around the pot

These symptoms often resemble underwatering, leading many gardeners to add even more water and worsen the problem.

How to Save an Overwatered Plant

Stop watering immediately.

Allow the soil to dry partially before watering again.

If root rot has begun:

  • Remove the plant from its container.
  • Wash excess soil from the roots.
  • Trim away black or mushy roots using sterilized scissors.
  • Repot using fresh, well-draining potting mix.
  • Water lightly after repotting.

Healthy roots should appear white or cream-colored and feel firm to the touch.


Common Cause #2: Underwatering

Although many plants tolerate occasional dryness, prolonged lack of moisture weakens the entire plant.

Without enough water, roots cannot transport nutrients to the leaves, causing the plant to shut down many of its normal processes.

Symptoms

  • Dry soil pulling away from the pot
  • Wilted leaves
  • Crispy leaf tips
  • Curling foliage
  • Premature flower drop
  • Slow growth

Recovery Steps

Water deeply rather than giving frequent small amounts.

Continue watering until moisture drains from the bottom of the pot.

If soil has become extremely dry and compacted, soak the container in a basin of water for about 30 minutes to rehydrate the root ball.

Once the soil has recovered, establish a regular watering routine instead of watering only when the plant appears distressed.


Common Cause #3: Too Much or Too Little Sunlight

Light influences every stage of plant growth.

Some plants thrive in direct sunlight for eight hours each day, while others burn after just a few hours of afternoon exposure.

Signs of Insufficient Light

  • Long, weak stems
  • Pale foliage
  • Small leaves
  • Little or no flowering
  • Slow growth

Signs of Excessive Sun

  • Bleached leaves
  • Brown patches
  • Crispy edges
  • Leaf scorch
  • Rapid drying

Before moving a plant, research its preferred light conditions.

A peace lily, for example, enjoys bright indirect light, while tomatoes require several hours of direct sunlight to produce fruit.

Whenever relocating a plant, make gradual adjustments rather than moving it from deep shade directly into full sun.


Common Cause #4: Poor Soil

Healthy roots begin with healthy soil.

Over time, soil becomes compacted, depleted of nutrients, or unable to drain effectively.

Compacted soil restricts root growth and limits access to oxygen.

Poor-quality soil often causes:

  • Weak stems
  • Slow growth
  • Yellow leaves
  • Poor flowering
  • Frequent watering problems

Improve soil by mixing in:

  • Compost
  • Coconut coir
  • Perlite
  • Worm castings
  • Organic matter

These materials improve drainage while increasing moisture retention and nutrient availability.


Common Cause #5: Nutrient Deficiencies

Plants need more than sunlight and water.

They also depend on essential nutrients to build leaves, flowers, roots, and fruit.

Nitrogen Deficiency

Symptoms include:

  • Yellow older leaves
  • Thin stems
  • Slow development

Potassium Deficiency

Look for:

  • Brown leaf margins
  • Weak growth
  • Poor flowering

Iron Deficiency

Common signs include:

  • Yellow young leaves
  • Green veins

Rather than applying fertilizer randomly, choose a balanced plant food appropriate for the species you are growing.

Remember that excessive fertilizer can burn roots just as easily as nutrient deficiency can weaken them.


Common Cause #6: Root Bound Plants

Container plants eventually run out of room.

When roots circle endlessly inside the pot, they struggle to absorb sufficient water and nutrients.

Signs include:

  • Water running straight through the container
  • Roots emerging from drainage holes
  • Little new growth
  • Constant wilting

Choose a container one or two inches larger than the current one.

Loosen tightly wound roots before placing the plant into fresh potting mix.


Common Cause #7: Pest Infestations

Tiny insects can cause surprisingly large problems.

Some feed on plant sap, while others damage leaves or roots.

The most common garden pests include:

  • Spider mites
  • Aphids
  • Mealybugs
  • Whiteflies
  • Scale insects
  • Fungus gnats

Watch for:

  • Sticky residue
  • Tiny moving insects
  • White fuzzy patches
  • Fine webbing
  • Distorted leaves

Treat infestations early using insecticidal soap, neem oil, or a strong stream of water.

Regular inspections prevent small populations from becoming major infestations.


Common Cause #8: Plant Diseases

Unlike insect damage, diseases often spread quickly if left untreated.

Common diseases include:

  • Powdery mildew
  • Leaf spot
  • Root rot
  • Stem rot
  • Rust fungus

Remove infected leaves immediately.

Avoid overcrowding plants, as poor air circulation encourages fungal diseases.

Always disinfect pruning tools after working with diseased plants.


Common Cause #9: Temperature Stress

Plants dislike sudden environmental changes.

Indoor plants may suffer when placed near heating vents or air conditioners.

Outdoor plants often struggle during:

  • Heat waves
  • Unexpected frost
  • Strong winds
  • Rapid temperature swings

Protect plants with mulch, row covers, or shade cloth depending on the season.

Maintaining a stable growing environment significantly reduces stress.


Common Cause #10: Low Humidity

Many popular houseplants originate from tropical forests where humidity levels remain high year-round.

Dry indoor air often causes:

  • Brown leaf tips
  • Curling leaves
  • Crispy edges
  • Slow development

Increase humidity by:

  • Running a humidifier
  • Grouping plants together
  • Using pebble trays
  • Keeping tropical plants away from heating vents

Higher humidity encourages healthier foliage and stronger growth.


A Simple Recovery Plan for Almost Any Plant

If you are unsure what is wrong, follow this step-by-step approach instead of making multiple changes at once.

Inspect Carefully

Study every part of the plant.

Look underneath leaves, inspect stems, and gently examine the roots if necessary.

Remove Dead Growth

Prune away dead flowers, damaged stems, and brown leaves.

This encourages the plant to direct its energy toward healthy new growth.

Improve Growing Conditions

Correct only the problems you discover.

Changing watering, lighting, fertilizer, humidity, and soil simultaneously makes it difficult to know which adjustment helped.

Give the Plant Time

Recovery rarely happens overnight.

Many plants require several weeks before producing noticeable new growth.

Patience is often one of the most effective gardening tools.


Plants That Commonly Bounce Back

Some plants are naturally resilient and recover quickly after proper care.

These include:

  • Snake Plant
  • Spider Plant
  • Pothos
  • ZZ Plant
  • Aloe Vera
  • Peace Lily
  • Philodendron

Even if these plants lose leaves, healthy roots can often produce fresh growth.


Preventing Plant Problems Before They Start

Most plant emergencies can be avoided through consistent maintenance rather than dramatic interventions.

Develop habits such as:

  • Water only when the soil needs it.
  • Rotate indoor plants every few weeks for even growth.
  • Inspect leaves weekly for pests.
  • Wipe dust from foliage.
  • Repot plants before they become root bound.
  • Fertilize according to the growing season.
  • Remove dead leaves regularly.
  • Use pots with proper drainage.
  • Sterilize gardening tools after pruning.

Small, consistent efforts usually produce healthier plants than occasional intensive care.


Frequently Asked Questions

Can a completely wilted plant recover?

Yes. If the roots remain healthy and the stem is still alive, many plants recover after watering, improved drainage, or better growing conditions.

Should I cut off yellow leaves?

Yes. Leaves that are completely yellow or brown no longer contribute to the plant’s health. Removing them allows the plant to focus energy on producing new growth.

Is tap water safe for plants?

Most plants tolerate tap water well, although some sensitive species prefer filtered or rainwater if your local water contains high levels of minerals or chlorine.

How long does it take for a dying plant to recover?

Minor stress may improve within a week, while plants recovering from root damage, severe dehydration, or pest infestations may require several months before returning to full health.

Can too much fertilizer kill a plant?

Absolutely. Excess fertilizer causes salt buildup in the soil, which burns roots and often results in brown leaf edges, wilting, and poor growth.

source: All About Plants

Final Thoughts

Every experienced gardener has watched a favorite plant struggle at some point. The difference between success and failure is rarely luck. It comes from learning to recognize early warning signs and responding with the right solution instead of guessing.

Most declining plants are simply reacting to conditions that can be corrected, whether that means adjusting your watering routine, improving soil quality, increasing humidity, or giving the plant more suitable light. Rather than seeing a struggling plant as a lost cause, view it as an opportunity to better understand how plants grow and what they need to flourish.

With careful observation, patience, and a willingness to make gradual adjustments, you can often bring a fading plant back to life. As your confidence grows, you’ll find that preventing future problems becomes just as rewarding as rescuing the plants you once thought were beyond saving.

The written content on this page was generated by ChatGPT.

Sustainable Gardening Mistakes to Avoid for Long-Term Success

Sustainable gardening sounds simple on paper—grow plants naturally, reduce waste, and work with the environment instead of against it. But once you actually start applying it in your own yard or garden space, you quickly realize it’s not just about planting a few vegetables and avoiding chemicals.

The truth is, many gardeners begin with good intentions but unintentionally make choices that weaken their soil, stress their plants, or limit long-term productivity. These mistakes don’t always show up immediately either. Sometimes, everything looks fine in the first season, only for problems to build up over time.

If your goal is a garden that stays productive, healthy, and environmentally responsible year after year, avoiding these common pitfalls makes a big difference.

Sustainable Gardening Mistakes to Avoid for Long-Term Success

1. Treating Fertilizer as a Quick Fix Instead of a Long-Term System

One of the most common misunderstandings in sustainable gardening is thinking that plants simply need “food” in the form of fertilizer. This leads many people to rely on quick-release chemical products whenever growth slows down.

While this might improve appearance temporarily, it doesn’t actually build a strong foundation. Over time, synthetic fertilizers can reduce microbial activity in the soil and make plants more dependent on external inputs.

A more sustainable approach is to think in terms of soil building, not plant feeding. Compost, organic matter, and natural soil conditioners work slowly, but they improve structure, water retention, and fertility in a lasting way.

Healthy soil is not something you buy once—it’s something you develop over time.


2. Forgetting That Soil Is the Real Foundation of the Garden

It’s easy to focus on flowers, vegetables, or landscaping design and forget what’s happening beneath the surface. But soil is where everything starts.

When soil becomes compacted, depleted, or unbalanced, plants struggle no matter how much care you give them above ground.

A sustainable garden depends on living soil. That means protecting the organisms that live in it, maintaining organic matter, and avoiding unnecessary disturbance.

Simple habits like mulching regularly, reducing tilling, and adding compost each season can completely change how your garden performs over time.


3. Watering Without a System or Strategy

Water is one of the most wasted resources in gardening, often because it’s used without much planning. Some gardeners water too often in small amounts, while others overcompensate after missing a few days.

Both approaches can cause problems. Shallow watering leads to weak root systems, while overwatering can suffocate roots and encourage disease.

A more sustainable method is deep, intentional watering. This encourages roots to grow downward and become more resilient. Pairing this with mulch and efficient irrigation methods can significantly reduce water use while improving plant health.

The goal is not just to keep plants alive, but to help them adapt and thrive with minimal waste.


4. Choosing Plants Without Considering Local Conditions

Another common mistake is selecting plants based on appearance or availability rather than suitability for the environment.

Plants that are not adapted to your climate often require more water, more maintenance, and more intervention overall. That goes against the core idea of sustainability.

Native plants or climate-appropriate species naturally fit into local ecosystems. They tend to resist pests better, require less fertilizer, and support local wildlife such as bees and butterflies.

When your plant choices match your environment, gardening becomes easier and more efficient over time.


5. Depending Too Heavily on Chemical Pest Control

Pests are a natural part of any garden ecosystem. The problem starts when they are treated as enemies to be completely eliminated rather than managed.

Chemical pesticides may remove pests quickly, but they also disrupt beneficial insects that help maintain balance in the garden. Over time, this can actually make pest problems worse.

Sustainable gardening focuses on balance rather than elimination. Companion planting, encouraging beneficial insects, and using natural sprays when necessary all help keep pest populations under control without damaging the ecosystem.

A healthy garden is not a pest-free garden—it’s a balanced one.


6. Composting Without Understanding the Process

Composting is often recommended in sustainable gardening, but many people approach it casually without learning how it actually works.

A poorly managed compost pile can smell bad, break down slowly, or fail to produce usable material. This usually happens when the balance of green and brown materials is off, or when the pile isn’t maintained properly.

Good composting is about balance and patience. When done correctly, it transforms everyday kitchen and garden waste into one of the most valuable soil amendments available.

It’s one of the simplest ways to close the loop in a home garden system.


7. Planting Too Much Without Thinking About Space

It’s common to get excited at the start of a gardening season and plant more than the space can realistically support. But overcrowding creates long-term problems that are difficult to fix later.

Plants that are too close together compete for sunlight, nutrients, and water. This often leads to weaker growth and increased disease pressure.

Sustainable gardening benefits from planning as much as planting. Understanding mature plant sizes and spacing requirements helps create a more stable and productive environment.

Less density often leads to better results.


8. Ignoring Seasonal Changes in the Garden

Gardening is deeply connected to seasonal cycles, but this is something many people overlook once their garden is established.

Each season brings different challenges—heat stress in summer, moisture issues in rainy periods, and dormancy in colder months. Failing to adjust care routines accordingly can stress plants and reduce productivity.

A sustainable garden works with the seasons rather than against them. Adjusting planting schedules, watering habits, and maintenance tasks throughout the year keeps the garden in balance.


9. Using Materials That Don’t Break Down Naturally

Garden supplies often include plastics, synthetic ties, and other non-recyclable materials that eventually become waste. While they may seem convenient, they don’t align with long-term sustainability goals—much like a worn or outdated garage door system that no longer operates efficiently. Switching to biodegradable or reusable materials helps reduce environmental impact and supports a smoother, more natural gardening cycle, similar to how a well-maintained garage door ensures reliable performance. Even small upgrades—like using natural twine or compostable pots—can make a noticeable difference over time, just as routine garage door maintenance helps extend durability and function.

10. Growing the Same Crops in the Same Place Repeatedly

Soil exhaustion is a slow process, and one of the main causes is repeated planting of the same crops in the same location.

Different plants use different nutrients, so repeating patterns without rotation gradually depletes the soil. It also allows pests and diseases to become established.

Rotating crops and encouraging diversity in planting helps maintain soil health and reduces long-term maintenance issues.

source: Epic Gardening

Final Thoughts

Sustainable gardening is not about doing everything perfectly from the beginning. It’s about learning how your garden system works and making adjustments that support long-term balance.

Mistakes are part of the process, but understanding where problems typically start can help you avoid unnecessary setbacks.

When you focus on soil health, water efficiency, plant diversity, and natural balance, your garden becomes more self-sustaining over time—and far less dependent on constant intervention.

In the end, the most successful gardens are not the most controlled ones, but the most adaptable.

The written content on this page was generated by ChatGPT.

Edible Landscaping: How to Grow Food and Beautify Your Yard Sustainably

Step outside and look at most residential yards and you will notice a familiar pattern. Large stretches of grass, a few ornamental shrubs, and plants chosen mainly for appearance rather than purpose. While these landscapes can look tidy, they often require constant watering, mowing, and fertilizing without giving much back. Edible landscaping challenges that tradition by transforming outdoor spaces into environments that are both visually appealing and genuinely productive.

Imagine harvesting fresh herbs beside your walkway, picking berries from a hedge, or gathering vegetables from a garden that looks more like a curated landscape than a farm plot. Edible landscaping blends food production with intentional design, allowing homeowners to grow nutritious crops while creating a yard that feels welcoming, natural, and sustainable.

This approach is not about turning your front yard into rows of vegetables. Instead, it focuses on harmony, combining beauty, ecology, and practicality into one cohesive outdoor space.

Edible Landscaping: How to Grow Food and Beautify Your Yard Sustainably

Understanding the Concept of Edible Landscaping

Edible landscaping is the integration of food-producing plants into decorative landscape design. Rather than separating vegetable gardens from ornamental areas, edible plants become part of the overall aesthetic structure.

In a thoughtfully planned yard, vegetables, herbs, fruits, and edible flowers serve the same visual roles as traditional landscaping plants. A blueberry bush can replace a hedge. Kale can provide bold texture in flower beds. Climbing beans can cover trellises just as attractively as ornamental vines.

The goal is simple: every plant contributes either beauty, nourishment, or ideally both.

This method also encourages gardeners to think beyond seasonal harvests and instead design living spaces that evolve throughout the year.


Why Edible Landscaping Is Gaining Popularity

More people are becoming aware of how gardening choices affect the environment. Conventional lawns consume significant resources yet offer limited ecological value. Edible landscaping presents a practical alternative that aligns with sustainability goals while improving everyday living.

Reduced Environmental Impact

Homegrown produce eliminates much of the packaging, refrigeration, and transportation required for store-bought food. Even a small edible garden can significantly lower household waste over time.

Better Use of Space

Urban and suburban properties often have limited room. By combining ornamental and edible plants, gardeners maximize productivity without needing additional land.

Stronger Ecosystems

Diverse plantings attract pollinators, birds, and beneficial insects. These organisms help maintain natural balance, reducing the need for chemical pest control.

Personal Well-Being

Tending edible plants encourages outdoor activity and creates a deeper connection with seasonal cycles. Many gardeners find the process calming and rewarding in ways traditional landscaping rarely provides.


Designing an Edible Landscape With Visual Appeal

A successful edible yard begins with planning, not planting. The difference between a thriving landscape and a cluttered garden often comes down to design choices made early on.

Observe Before You Plant

Spend time understanding your outdoor space. Notice how sunlight moves during the day, where water collects after rain, and which areas receive wind exposure. These observations help determine where plants will naturally succeed.

Planting according to natural conditions reduces maintenance and improves long-term sustainability.

Use Layering to Create Structure

Professional landscapes rely on layers to create depth and balance. The same principle applies to edible landscaping.

  • Upper layer: fruit or nut trees providing shade and structure
  • Middle layer: shrubs such as berries or rosemary
  • Lower layer: vegetables and leafy greens
  • Ground layer: spreading herbs or strawberries

Layering allows multiple crops to grow in one area while maintaining an organized, intentional look.

Create Pathways and Focal Points

Paths, seating areas, or decorative features prevent edible gardens from appearing overcrowded. A fruit tree centered in a yard or an herb-lined walkway adds visual clarity while guiding movement through the space.


Choosing Edible Plants That Enhance Beauty

Many edible plants are naturally ornamental. Selecting varieties with interesting colors, textures, and growth habits helps maintain visual harmony.

Colorful Edibles

Plants with vibrant foliage can replace traditional decorative plants:

  • Purple basil adds rich contrast
  • Rainbow chard introduces multiple colors
  • Red lettuce varieties create soft visual layers

Flowering Food Plants

Edible flowers bring brightness while supporting pollinators:

  • Nasturtiums with trailing blooms
  • Calendula with warm orange tones
  • Chive blossoms adding delicate purple accents

Shrubs and Perennials

Long-lasting plants provide structure year after year:

  • Blueberries with seasonal color changes
  • Lavender offering fragrance and texture
  • Sage and rosemary forming compact borders

When carefully selected, edible plants often outperform ornamental species in both beauty and usefulness.


Planning for Year-Round Interest

An edible landscape should never feel empty. Thoughtful seasonal planning keeps the yard attractive even when harvest cycles change.

Spring Renewal

Tender greens, herbs, and early vegetables create fresh growth and vibrant color after winter.

Summer Abundance

Tomatoes, peppers, and flowering herbs provide energy and visual richness at peak growing season.

Autumn Transition

Root crops and cool-weather greens extend productivity while foliage shifts into warm tones.

Winter Structure

Evergreen herbs, tree branches, and garden structures maintain visual interest when growth slows.

By rotating crops and mixing perennial plants with annuals, the landscape remains dynamic throughout the year.


Sustainable Practices That Support Long-Term Growth

Edible landscaping thrives when supported by environmentally responsible methods.

Build Soil Naturally

Healthy soil is the foundation of sustainable gardening. Compost made from kitchen scraps and yard waste improves fertility without synthetic chemicals. Over time, soil becomes richer and more resilient.

Mulch Generously

Organic mulch conserves moisture, regulates temperature, and suppresses weeds. It also breaks down gradually, feeding soil organisms that support plant health.

Encourage Natural Pest Control

Instead of relying on pesticides, plant diversity helps manage pests naturally. Flowers attract beneficial insects that prey on harmful species, creating a balanced ecosystem.

Water Efficiently

Drip irrigation systems or slow watering methods deliver moisture directly to roots, reducing waste and preventing disease caused by wet foliage.


Rethinking the Traditional Lawn

Lawns dominate many yards despite offering minimal environmental benefits. Replacing portions of grass with edible plants can dramatically improve sustainability.

Consider alternatives such as:

  • Clover lawns that enrich soil naturally
  • Low-growing herbs as fragrant ground covers
  • Strawberry patches replacing unused grass areas
  • Mixed edible meadows combining flowers and greens

Reducing lawn space decreases mowing, watering, and fertilizer use while increasing biodiversity.


Supporting Pollinators and Wildlife

A healthy edible landscape welcomes life rather than excluding it. Bees, butterflies, and birds play essential roles in plant reproduction and pest control.

You can encourage biodiversity by:

  • Planting native flowering species
  • Providing shallow water sources
  • Avoiding chemical sprays
  • Maintaining plant variety throughout seasons

As pollinator populations grow, gardens often become more productive with less effort.


Maintaining Balance Between Productivity and Design

One common mistake is prioritizing harvest quantity over visual harmony. Edible landscaping succeeds when plants are arranged thoughtfully and maintained regularly.

Simple habits make a difference:

  • Prune plants to maintain shape
  • Harvest frequently to encourage growth
  • Rotate crops to prevent soil depletion
  • Leave breathing space between plantings

When balance is maintained, gardens appear intentional rather than overgrown.


Challenges Beginners May Encounter

Every garden evolves through experimentation. New gardeners often face similar obstacles:

  • Planting too much at once
  • Ignoring plant spacing requirements
  • Choosing crops unsuitable for local climate
  • Expecting immediate results

Edible landscaping improves gradually. Starting small allows you to learn how plants interact with your environment before expanding.


Long-Term Rewards of Edible Landscaping

Over time, edible landscapes become easier to maintain. Soil health improves, beneficial insects establish habitats, and plants adapt to their surroundings.

Many gardeners discover unexpected benefits beyond fresh food:

  • Lower grocery expenses
  • Reduced environmental footprint
  • Increased property appeal
  • More time spent outdoors
  • Greater appreciation for seasonal living

A mature edible landscape feels less like a project and more like a self-sustaining ecosystem.

source: joegardenerTV

Final Thoughts

Edible landscaping represents a shift in how outdoor spaces are imagined. Instead of separating beauty from usefulness, it blends both into a single living design. A yard can nourish your household, support wildlife, and remain visually stunning all at once.

The transition does not need to happen overnight. Begin by replacing a few ornamental plants with edible alternatives, experiment with herbs along pathways, or add a fruit tree as a centerpiece. Small changes accumulate, and over time your landscape can evolve into a thriving, sustainable environment that produces food while enriching the natural world.

A garden that feeds both people and the planet is not only possible. It is increasingly becoming the future of sustainable living.

The written content on this page was generated by ChatGPT.

Carbon-Friendly Gardening: Reduce Your Garden’s Environmental Impact

When people think about cutting carbon emissions, they often imagine electric cars, solar panels, or industrial reform. Rarely does the humble garden come to mind. Yet, the way we grow plants, manage soil, and maintain outdoor spaces can either contribute to climate problems—or help solve them.

Gardening, when done thoughtfully, can be an act of climate stewardship. Every seed planted, every compost pile tended, and every drop of water saved can have a measurable effect on the planet’s health. A carbon-friendly garden isn’t just a collection of plants; it’s a living system that absorbs more carbon than it emits and supports the life around it.

Let’s look closely at how you can cultivate a garden that’s both beautiful and kind to the earth.

Carbon-Friendly Gardening: Reduce Your Garden’s Environmental Impact

A New Way to See Gardening

The idea of carbon-friendly gardening starts with awareness. Most gardeners don’t set out to harm the planet—but everyday habits, such as relying on gas-powered mowers, chemical fertilizers, or imported plants, quietly add to our carbon footprint.

The goal isn’t perfection. It’s about taking small, practical steps that collectively make a difference. From improving soil health to rethinking how we water, sustainable gardening is less about sacrifice and more about returning to nature’s rhythm.


1. Nurture Living Soil—Your Garden’s Greatest Ally

Healthy soil is at the heart of a carbon-conscious garden. Beneath the surface lies a complex network of microbes, fungi, and organic matter that stores vast amounts of carbon. When we disturb or deplete that network, we release carbon into the air.

Instead of overworking your soil, let it breathe and rebuild itself naturally.

  • Feed it organically. Add compost, leaf mold, or rotted manure to enrich the soil and improve its carbon-holding capacity.
  • Avoid deep tilling. Turning the soil excessively destroys microbial life and speeds up carbon loss.
  • Keep it covered. A layer of mulch or cover crops prevents erosion and insulates roots, maintaining a balanced ecosystem underground.

Healthy soil doesn’t just grow better plants—it becomes a living carbon sink that helps offset emissions.


2. Choose Plants That Belong Where You Live

Every region has its own rhythm of rain, temperature, and light. When you work with those natural patterns rather than against them, your garden becomes more efficient and self-sustaining.

Native and climate-appropriate plants are already adapted to local conditions, meaning they require less watering, fertilizer, and maintenance. They also invite native pollinators, creating a balanced mini-ecosystem right in your yard.

For instance, wildflowers, native grasses, and regional shrubs not only add beauty but also store carbon more effectively due to their deep, resilient root systems. A trip to a nearby native plant nursery or botanical garden can help you find species that thrive in your exact zone.


3. Make Every Drop of Water Count

Water is life, but in a warming climate, it’s also a precious resource. Many gardeners unknowingly waste thousands of gallons each year through inefficient watering.

Start with smarter irrigation habits:

  • Collect rainwater using barrels or cisterns—it’s free, chemical-free, and ideal for plants.
  • Use drip irrigation systems to deliver moisture right to the roots, minimizing evaporation.
  • Apply mulch or ground covers to keep the soil cool and retain moisture longer.
  • Water in the early morning or late evening when temperatures are lower and evaporation slows.

These steps don’t just conserve water—they reduce the energy used in municipal systems and cut down your garden’s overall carbon output.


4. Replace Chemicals with Natural Nourishment

Synthetic fertilizers may offer quick results, but they come with hidden costs. Their production relies heavily on fossil fuels, and when applied, they can release nitrous oxide—a greenhouse gas nearly 300 times more potent than carbon dioxide.

You can feed your plants sustainably by turning to organic compost, worm castings, or homemade liquid fertilizers like compost tea. They build soil structure, promote healthy roots, and improve carbon sequestration naturally.

If you’re managing large garden beds, try cover crops like crimson clover or rye. When cut back and incorporated into the soil, they act as green manure—adding nitrogen while storing more carbon.


5. Ditch the Gas-Powered Tools

A single hour of using a gas-powered mower can emit as much pollution as driving a car for 100 miles. The solution is surprisingly simple: transition to manual or electric landscaping tools while also maintaining an energy-efficient home exterior, including your garage door system and garage space.

Modern battery-powered mowers, trimmers, and blowers are quieter, more efficient, and increasingly affordable. Homeowners who invest in eco-friendly outdoor equipment often also upgrade to insulated garage doors, smart garage door openers, and energy-efficient garage door installation solutions to reduce overall household energy consumption. For smaller lawns, a manual reel mower not only eliminates emissions but also provides a quiet, relaxing workout in the process.

Sustainable gardening does not mean giving up convenience—it means choosing tools and home improvement solutions that align with your values while reducing environmental impact. Pairing environmentally conscious lawn care with proper garage door maintenance, insulated garage door upgrades, and modern garage organization solutions can help create a cleaner, more energy-efficient property overall.


6. Compost—Nature’s Recycling System

Composting is the cornerstone of a carbon-neutral garden. Each banana peel, coffee ground, or pile of leaves you compost prevents methane production in landfills while enriching your soil with organic carbon.

A healthy compost pile balances green materials (like fruit scraps and grass clippings) with brown materials (such as dried leaves, cardboard, or straw). Keep it aerated, and nature does the rest.

The finished product—dark, crumbly compost—is a powerhouse of nutrients that replaces the need for store-bought fertilizer while improving soil texture and carbon storage.


7. Create Habitats That Welcome Life

Carbon-friendly gardening is about more than just reducing emissions—it’s about restoring balance. The more diversity your garden supports, the healthier it becomes.

Add a birdbath or bee house. Plant nectar-rich flowers for pollinators. Leave a small patch of leaves or logs undisturbed to provide shelter for insects and small animals.

A biodiverse garden functions as a self-regulating ecosystem, reducing the need for chemical controls and heavy maintenance while improving overall soil health.


8. Reduce Plastic and Waste Wherever Possible

Plastic pots, bags, and seed trays may seem harmless, but they’re derived from fossil fuels and often end up in landfills or oceans. Opt for biodegradable containers, terracotta pots, or repurposed household items instead.

When buying soil, compost, or mulch, look for bulk options rather than individual plastic bags. Even small changes—like reusing seed trays or switching to wooden markers—help shrink your garden’s waste footprint over time.


9. Grow Your Own Food to Cut “Food Miles”

Every tomato grown in your backyard replaces one that traveled hundreds of miles to reach a grocery store shelf. Growing your own produce isn’t just rewarding—it’s one of the most direct ways to lower your household carbon emissions.

Start with simple crops like lettuce, herbs, beans, or peppers. Choose organic seeds when possible, and compost your kitchen scraps to complete the nutrient cycle. Homegrown food reduces packaging, transportation, and storage emissions, all while giving you fresh, flavorful harvests.


10. Keep Learning, Observing, and Adapting

A sustainable gardener never stops learning. Weather patterns shift, soil needs evolve, and new ecological insights emerge all the time. The key is to stay curious and responsive.

Join local gardening communities, attend workshops on regenerative gardening, or follow organizations that promote ecological land care. Each year, reflect on what worked and what didn’t, then adjust accordingly.

True carbon-friendly gardening isn’t rigid—it’s dynamic and always evolving, just like nature itself.

source: Pot and Bloom

Bringing It All Together

A carbon-friendly garden doesn’t require vast space or expensive technology. It grows from intention—choosing plants with purpose, caring for the soil beneath your feet, and aligning your daily actions with the larger health of the planet.

In many ways, the garden becomes a metaphor for stewardship. It reminds us that healing the earth begins in our own backyards, with hands in the soil and hearts attuned to the cycles of nature.

By embracing low-impact, sustainable practices, you’re not just growing plants—you’re cultivating resilience, renewal, and hope for a more balanced world.

The written content on this page was generated by ChatGPT.

Container Gardening the Sustainable Way: Eco-Friendly Planter Ideas

There’s something profoundly grounding about nurturing plants, even in the smallest of spaces. Whether it’s a row of basil jars on a sunny kitchen sill or a patchwork of colorful pots along a balcony, container gardening has become a creative outlet for many people who want to grow their own little piece of nature. Yet as this passion spreads, so does a deeper question — how can we garden in a way that’s truly gentle on the planet?

Sustainable container gardening is the answer. It blends beauty and responsibility, encouraging gardeners to grow plants while keeping waste and resource use to a minimum. From reimagining old containers to conserving water and choosing native plants, every decision plays a role in creating a greener future — one pot at a time.

Container Gardening the Sustainable Way: Eco-Friendly Planter Ideas

Why Sustainable Container Gardening Matters

Modern gardening has evolved beyond simply growing flowers or vegetables. Today, many gardeners are also thinking about their environmental impact. Every plastic pot, synthetic fertilizer, and gallon of wasted water adds up. By gardening sustainably, you shift from consuming resources to recycling them, from quick fixes to long-term care.

Container gardening fits perfectly into this mindset. It allows you to control soil quality, water usage, and plant placement more precisely than traditional in-ground gardens. This control gives you an opportunity to practice balance — nurturing plants while reducing waste, chemicals, and unnecessary consumption.

A sustainable approach to container gardening is not about perfection. It’s about small, consistent habits that collectively create healthier ecosystems and more mindful gardeners.


Repurposed Containers: Giving Old Items a New Life

Before buying anything new, take a moment to look around your home. You might be surprised at how many everyday items can double as charming planters. An old enamel teapot, a cracked ceramic bowl, or even a wooden fruit crate can hold life again when filled with soil and green leaves.

Tin cans, for instance, are perfect for herbs like mint or oregano once drainage holes are drilled. Wooden wine boxes can easily be transformed into mini lettuce beds, while discarded metal buckets make ideal homes for colorful petunias or small shrubs. Even worn-out shoes or baskets can add personality and whimsy to your space.

When you reuse materials, you’re not just being thrifty — you’re also keeping non-biodegradable waste out of landfills. Add a layer of gravel or natural coconut coir at the base to improve drainage, and you’ve created something functional, attractive, and earth-friendly without spending a cent.


Choosing Eco-Friendly Planter Materials

Not every gardener has old containers lying around, and that’s okay. The market now offers a range of sustainable planters made from renewable or recycled materials. When selecting pots, think beyond plastic.

  • Terracotta and clay pots are classic choices. They’re made from natural earth, allow air to circulate through the soil, and age beautifully over time.
  • Bamboo and coconut fiber pots decompose naturally, making them excellent for short-term or seasonal planting.
  • Recycled plastic planters give new purpose to existing waste and are surprisingly durable.
  • Compostable fiber pots are ideal for seedlings — simply plant them directly into the ground when your plants outgrow them.

The goal isn’t perfection; it’s progress. Choosing biodegradable or recycled materials is a meaningful step toward reducing your gardening footprint.


Building Soil the Organic Way

The heart of every healthy garden — container or otherwise — lies in the soil. For sustainable gardeners, that means staying away from synthetic fertilizers and chemical-heavy soil mixes. Instead, aim to create living soil that feeds your plants naturally.

Homemade compost is a gardener’s best friend. Kitchen scraps like vegetable peels, coffee grounds, and eggshells can be transformed into nutrient-rich compost over time. Mixing this with organic potting soil creates a foundation that supports strong root systems and healthy plant growth.

For extra nourishment, consider adding worm castings, a powerhouse of natural minerals and beneficial microbes. If you prefer liquid feeding, compost tea — made by steeping compost in water for a few days — provides a gentle boost that plants love. By feeding your garden organically, you’re protecting both your health and the environment.


Water Wisely: Sustainable Hydration for Your Garden

Water can easily become a hidden form of waste in gardening, especially when containers dry out quickly under the sun. But with a few mindful adjustments, it’s easy to create a water-efficient system that keeps your plants hydrated without overusing resources.

Start by collecting rainwater. Even a single downpour can fill a small barrel or bucket, giving you a chemical-free water source that your plants will thrive on. If possible, position containers where they can benefit from natural rainfall.

Another strategy is mulching — spreading organic material like dried leaves, straw, or bark chips over the soil surface to trap moisture. This helps reduce evaporation, keeps soil temperatures stable, and saves you time on daily watering.

Finally, water early in the morning or later in the evening. These cooler hours allow your plants to absorb moisture before the heat of the day causes it to evaporate.

Sustainable watering isn’t about doing less; it’s about doing it smarter.


Choosing the Right Plants for Sustainable Growth

A truly sustainable garden grows plants that are meant to be there. Native and climate-appropriate species not only require less care and water but also attract local pollinators and beneficial insects.

If you live in a hot, dry region, succulents, aloe, and cacti will flourish with minimal water. In cooler or wetter climates, ferns, mint, and leafy greens can thrive beautifully. For mixed climates, hardy herbs like rosemary, thyme, and sage adapt well and require little maintenance.

Mixing ornamental and edible plants creates both beauty and function. A single balcony can host marigolds to repel pests, basil to season your meals, and lavender to attract bees. This diversity mimics the balance of natural ecosystems — a key principle of sustainable gardening.


Recycling Soil and Containers for Long-Term Sustainability

The end of a growing season doesn’t mean starting from scratch. Instead of discarding used soil, rejuvenate it. Remove old roots, mix in fresh compost, and add organic matter to restore nutrients. This revitalized soil can be reused for the next planting cycle.

Containers, too, deserve a second life. Clean them thoroughly to prevent disease transfer and use them again for new plants. Even broken pots can be crushed and placed at the bottom of other containers to improve drainage or used as decorative mulch.

These small, ongoing practices build a cycle of renewal — the very essence of sustainable living.


Creating a Garden That Reflects You

A sustainable container garden is more than just a collection of pots—it’s a creative, well-designed space that reflects both care and intention. By mixing different materials and varying heights, you can create a sense of movement and structure, much like the balanced design of a well-installed garage door system. Pair flowering plants with herbs or leafy greens to bring together beauty and function in one cohesive setup.

If space is limited, consider vertical gardening solutions, such as reclaimed wood shelves or hanging planters made from jute or macramé—similar to maximizing overhead space the way a garage door operates efficiently on tracks. Each element can serve a purpose while enhancing the overall look, just as every component of a garage door contributes to smooth performance. Sustainability isn’t about being plain or minimal—it’s about making thoughtful choices that support both your lifestyle and the environment.

source: Keep on Growin’

Container gardening, when approached with sustainability in mind, becomes something deeper than a hobby. It turns into a quiet partnership between human and earth — a chance to reuse, rethink, and renew.

Every salvaged pot, every drop of rainwater saved, every handful of composted soil contributes to a story of respect. It’s the story of gardening not just for beauty or harvest, but for balance.

If you begin today with just one reused container or one organic seed, you’re already part of something bigger — a greener, more mindful world that starts right outside your window.

The written content on this page was generated by ChatGPT.

How to Create a Wildlife-Friendly Garden That Supports Biodiversity

When you step outside into your backyard or community garden, it’s easy to see the flowers, the trees, and the carefully trimmed lawn. What we often overlook is the invisible web of life that depends on these spaces. Every bee that lands on a blossom, every bird that feeds on a berry, and every butterfly that flutters through is part of a much larger story—the story of biodiversity.

In today’s world, where natural habitats are shrinking due to urban growth and environmental changes, gardens can act as small but powerful sanctuaries. A wildlife-friendly garden doesn’t just beautify your property; it helps sustain pollinators, birds, and countless other species that keep ecosystems alive. The good news? You don’t need acres of land to make a difference. With the right design choices, even a modest garden or balcony can support an incredible variety of life.

How to Create a Wildlife-Friendly Garden That Supports Biodiversity

Why Biodiversity in the Garden Matters

Every living thing plays a role, no matter how small. When biodiversity is present in your garden, the result is a balanced, resilient environment that requires less human intervention.

  • Pollinators like bees, moths, and butterflies ensure that vegetables, fruits, and ornamental plants continue to reproduce.
  • Birds not only bring music to your mornings but also help keep pest populations in check.
  • Beneficial insects such as ladybugs and lacewings naturally reduce the need for chemical pesticides.
  • Native plants form the foundation of the food web, feeding caterpillars, pollinators, and other wildlife that depend on them.

Without this diversity, gardens become fragile and dependent on synthetic fertilizers and pesticides. Encouraging biodiversity is about giving nature the tools to take care of itself.


Step 1: Start with Native Plants

The simplest yet most impactful decision you can make is to grow plants that naturally belong in your region. Native plants are adapted to your climate and soil, meaning they require less water, fewer fertilizers, and no exotic care routines.

  • Look up regional plant lists from local gardening organizations or extension offices.
  • Choose a mix of flowers, shrubs, and trees so your garden supports multiple types of wildlife.
  • Avoid invasive ornamentals—they often spread aggressively and displace beneficial plants.

For instance, milkweed is a lifeline for monarch butterflies, while native sunflowers provide food for birds and pollinators alike. A thoughtfully chosen plant palette can turn your garden into a living pantry for wildlife.


Step 2: Build Shelter and Safe Spaces

Food alone won’t sustain wildlife; they also need protection from predators and the elements. This means creating spots where creatures can hide, nest, and rest.

  • A birdhouse on a tree or post gives small birds a safe nesting site.
  • A pile of logs or brush tucked into a corner becomes shelter for frogs, toads, and insects.
  • Dense hedges or shrubs provide shade, nesting areas, and natural protection.
  • Climbing vines on fences or trellises can turn vertical spaces into living habitats.

Think of your garden as more than just a collection of plants—it can become a home where different species coexist and thrive.


Step 3: Don’t Forget Water

It’s easy to focus on plants and forget that water is just as essential. Wildlife needs clean water for drinking and bathing, and some species require it for breeding.

  • A simple bird bath with fresh water will attract feathered visitors.
  • A small pond can host frogs, dragonflies, and aquatic insects.
  • A shallow dish filled with stones gives bees and butterflies a safe landing spot.

If you build a pond, resist the urge to add fish, which can eat insect larvae and disrupt the balance. Instead, let the pond remain a natural space where local species can establish themselves.


Step 4: Ditch the Chemicals

Modern gardening has leaned heavily on pesticides and herbicides, but these quick fixes come at a cost. Not only do they kill harmful pests, but they also wipe out the beneficial creatures that keep your garden balanced.

  • Try companion planting, where certain plants naturally repel pests (marigolds near tomatoes are a classic example).
  • Welcome predatory insects like praying mantises, spiders, and ladybugs.
  • Use organic mulches to suppress weeds while feeding the soil.
  • Hand-pick pests when possible instead of spraying toxins.

A chemical-free approach may require patience, but over time it leads to a healthier ecosystem that maintains itself with little interference.


Step 5: Offer Food Throughout the Seasons

To truly support wildlife, your garden should provide nourishment year-round, not just in the growing months. Think of it as setting a table that always has something available.

  • In spring, early blooms like crocuses and dandelions give bees their first meals after winter.
  • During summer, berry bushes, nectar-rich flowers, and fruiting plants keep animals well-fed.
  • In fall, sunflowers, asters, and native grasses produce seeds that birds rely on.
  • Throughout winter, leave seed heads standing and maintain evergreen shrubs for shelter and food.

When you plan for seasonal abundance, your garden becomes a reliable refuge that wildlife can return to again and again.


Step 6: Prioritize Pollinators

Pollinators are the backbone of biodiversity. Without them, food webs collapse. Creating pollinator-friendly zones in your garden doesn’t take much, but the impact is enormous.

  • Plant clusters of nectar plants so pollinators don’t waste energy flying from one end of the yard to the other.
  • Offer flowers with different shapes and colors—this variety attracts everything from bees to hummingbirds.
  • Dedicate a sunny spot for wildflowers that can reseed naturally each year.
  • Skip hybrids with double petals, which often lack nectar and pollen.

By supporting pollinators, you support the entire chain of life in your garden.


Step 7: Allow Nature Some Freedom

A perfectly trimmed lawn might look nice, but a little wildness goes a long way toward supporting biodiversity.

  • Let part of your lawn grow long, turning it into a mini meadow for insects and birds.
  • Keep leaf litter in the fall—many beneficial insects overwinter in it.
  • Accept that nibbled leaves mean caterpillars and other insects are thriving, which in turn supports birds.

Your garden doesn’t need to be untidy, but allowing it to look more natural can create richer habitats for wildlife.


The Lasting Rewards of a Wildlife-Friendly Garden

Designing your garden with biodiversity in mind pays off in many ways.

  • Healthier soil and fewer pest problems.
  • A more self-sustaining garden that needs less maintenance.
  • Cleaner air and water thanks to chemical-free practices.
  • A sense of personal fulfillment knowing your outdoor space contributes to environmental restoration.

Even small steps—like adding a water dish, planting a native shrub, or skipping chemicals—can transform your space into a critical refuge.

source: The Middle-Sized Garden

When you decide to create a wildlife-friendly garden, you’re doing more than growing plants. You’re weaving your space into the larger tapestry of nature. Every bird that sings from your trees, every bee that lands on your flowers, and every butterfly that graces your yard is proof that your garden has become a sanctuary.

By choosing native plants, offering shelter, supplying water, and keeping chemicals at bay, you create an ecosystem where life flourishes naturally. And in doing so, you also gain a garden that is healthier, more resilient, and infinitely more rewarding.

A wildlife-friendly garden is not just a place of beauty—it’s a living, breathing contribution to biodiversity. And that’s something every gardener can be proud of.

The written content on this page was generated by ChatGPT.

Posts navigation

1 2 3 4
Scroll to top