How to Increase Humidity for Tropical Houseplants

Tropical houseplants can bring a lush, vibrant feel to almost any room, but keeping them healthy indoors sometimes requires more than regular watering and good sunlight. Many popular tropical plants naturally grow in warm, humid environments, where moisture is present not only in the soil but also in the surrounding air. When indoor air becomes too dry, especially in air-conditioned or heated rooms, some tropical houseplants may begin showing brown leaf edges, curling leaves, crispy new growth, or slower development.

Fortunately, increasing humidity for tropical houseplants does not have to be complicated. There are several practical ways to create a more comfortable environment, from grouping plants together to using a humidifier or making small changes to where plants are positioned.

The key is understanding how humidity affects plants and choosing a method that fits your home, your plants, and your daily routine.
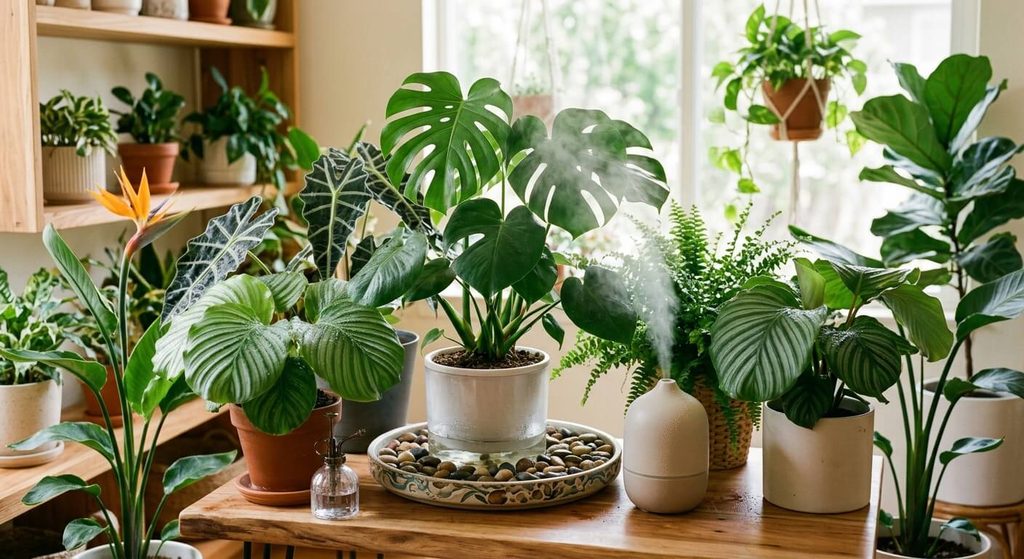
How to Increase Humidity for Tropical Houseplants
image generated using Google Gemini AI

Why Humidity Matters for Tropical Houseplants

Humidity refers to the amount of water vapor present in the air. Tropical plants are adapted to environments where humidity can remain relatively high, particularly in rainforests and other moist habitats.

Plants lose water through tiny openings in their leaves called stomata. This natural process, known as transpiration, helps regulate the plant and move water and nutrients through its tissues. When the surrounding air is very dry, water can leave the leaves more quickly.

A plant growing in consistently dry indoor air may struggle to maintain the moisture balance it is accustomed to.

This does not mean every tropical houseplant requires extremely high humidity. Different species have different tolerances. A tough houseplant may adapt to average indoor conditions, while a humidity-loving plant such as a calathea, anthurium, fern, or some tropical foliage varieties may respond more noticeably to dry air.

What Humidity Level Do Tropical Houseplants Need?

There is no single humidity percentage that is perfect for every tropical houseplant.

Many tropical plants can adapt to ordinary household humidity, but humidity-loving species generally appreciate conditions that are more humid than a very dry indoor environment. Instead of trying to create a rainforest inside your home, aim for a stable environment appropriate for the particular plant.

A digital hygrometer can make this much easier. Rather than guessing whether a room feels dry, you can measure the relative humidity directly.

If your plant repeatedly develops crispy leaf edges despite proper watering, appropriate lighting, and healthy roots, checking the humidity around it can help identify whether dry air may be contributing to the problem.

1. Use a Humidifier

For consistently dry indoor environments, a humidifier is one of the most effective ways to increase humidity.

A humidifier adds water vapor to the surrounding air, allowing you to raise humidity throughout a room rather than only around one plant.

This can be particularly useful if you have a large collection of tropical houseplants.

Choose the Right Size

The humidifier should be appropriate for the size of the room. A small unit may work well beside a plant shelf, while a larger room may require a model designed for greater coverage.

It is also useful to choose a humidifier that is easy to clean and refill. A device that is inconvenient to maintain is less likely to be used consistently.

Avoid Placing It Directly Against the Plant

You do not need to point the mist directly at the leaves.

The goal is to raise the humidity of the surrounding air, not to keep the foliage constantly wet. Excess moisture sitting on leaves can contribute to fungal and bacterial problems, particularly when air circulation is poor.

Position the humidifier so moisture can disperse throughout the space.

Keep the Humidifier Clean

Regular cleaning is important. Standing water and dirty humidifiers can become sources of microorganisms and mineral buildup.

Follow the manufacturer’s cleaning instructions and change the water as recommended.

2. Group Tropical Plants Together

One of the simplest ways to increase humidity around houseplants is to place several plants together.

Plants naturally release moisture through transpiration. When multiple plants are grouped in the same area, the air immediately around them can become somewhat more humid than the surrounding room.

This creates a small, localized microclimate.

You do not need a huge collection of plants to try this technique. Even several plants arranged together on a shelf, plant stand, or table can create a more sheltered environment.

However, avoid packing plants so tightly that air cannot move between them. Good airflow is still important for reducing the risk of fungal problems and pests.

3. Place Plants on a Humidity Tray

A humidity tray is another traditional method for increasing humidity around individual plants.

To make one, place a shallow tray beneath or near the plant and add pebbles or gravel. Add water to the tray, keeping the water level below the top of the stones.

The plant pot should sit on the pebbles rather than directly in standing water.

As water evaporates, it can increase moisture in the immediate area around the plant.

Does a Humidity Tray Really Work?

A humidity tray can provide some localized humidity, but its effect is usually limited. It is unlikely to dramatically increase the humidity of an entire room.

Think of it as a small environmental adjustment rather than a replacement for a humidifier.

It can be particularly useful when you want to make a modest change without adding another electrical device.

4. Move Plants Away From Dry Air Sources

Sometimes the easiest humidity improvement is simply changing where the plant lives.

Air conditioners, heaters, fans, and strong drafts can create drier conditions around foliage. A plant sitting directly beside an air-conditioning vent may experience a noticeably different environment from a plant several feet away.

Look around your room and identify areas where air is constantly moving.

Avoid placing humidity-sensitive plants directly in front of:

  • Air-conditioning vents
  • Heating vents
  • Strong fans
  • Frequently opened exterior doors
  • Drafty windows

This does not mean tropical plants should be kept in completely stagnant air. Gentle air movement is beneficial. The problem is prolonged exposure to strong, drying airflow.

5. Keep Plants in Naturally Humid Rooms

Some rooms naturally have more moisture in the air than others.

Bathrooms can sometimes provide a good environment for tropical houseplants, particularly when they receive sufficient natural or supplemental light.

A bright bathroom with regular shower use may provide naturally higher humidity than a dry bedroom or office.

Kitchens can also have higher humidity at certain times of the day, although temperature fluctuations, cooking heat, and limited light can make them less suitable for some plants.

When choosing a location, consider the entire environment rather than humidity alone.

A humid but dark room may be worse for a tropical plant than a moderately humid room with excellent indirect light.

6. Use a Glass Cabinet or Enclosed Plant Display

An enclosed cabinet can create a naturally humid microenvironment.

Because moisture released by the plants remains within the enclosure longer, humidity can rise considerably compared with an open shelf.

This approach can be especially useful for smaller tropical plants that require consistently humid conditions.

However, an enclosed environment needs careful management.

Too much moisture combined with stagnant air can encourage mold, fungal growth, and plant disease. Provide appropriate ventilation and monitor the conditions inside the cabinet.

A hygrometer is particularly useful for enclosed displays because humidity can change quickly.

7. Consider a Terrarium for Suitable Plants

Some tropical plants perform well in terrarium environments because the enclosed space retains moisture.

Terrariums can be especially suitable for smaller species that naturally prefer warm, humid conditions.

However, not every tropical houseplant belongs in a terrarium.

Large plants need more space, and some species require stronger airflow than a closed container can provide. Before placing a plant inside a terrarium, research its mature size, lighting requirements, watering needs, and tolerance for enclosed conditions.

8. Mist Carefully Rather Than Relying on Misting

Misting is one of the most commonly suggested ways to increase humidity for houseplants.

Although misting temporarily puts water droplets into the air and onto leaves, the effect on overall room humidity is usually short-lived. Once the water evaporates, the humidity returns toward its previous level.

That makes frequent misting a less reliable strategy than using a humidifier or creating a suitable microclimate.

Misting can also leave leaves wet for extended periods when airflow is poor.

For plants with delicate foliage, repeated wetting may create conditions that encourage leaf problems.

If you enjoy misting your plants, treat it as an occasional part of plant care rather than your primary humidity-control method.

9. Improve Air Circulation

Increasing humidity does not mean eliminating airflow.

In fact, good air circulation becomes increasingly important as humidity rises.

Warm, stagnant, humid air can create favorable conditions for fungal and bacterial problems. Plants also benefit from gentle air movement because it helps moisture evaporate from leaf surfaces.

A small fan can provide gentle circulation, but avoid blasting plants with strong airflow.

The goal is movement, not a constant stream of air directly across the leaves.

10. Check Humidity With a Hygrometer

A hygrometer is a simple device that measures relative humidity.

For plant owners, it can be much more useful than judging humidity by how the room feels.

Place the hygrometer near your plants, but avoid positioning it directly beside a humidifier outlet. You want to know the general conditions surrounding the plants rather than the concentrated moisture immediately coming from the machine.

If you have plants in several rooms, consider monitoring each area separately. One room may be significantly drier than another.

This can help explain why the same species performs well in one location but struggles in another.

11. Pay Attention to the Leaves

Your plants can provide useful clues about their environment.

Dry air may contribute to symptoms such as:

  • Brown or crispy leaf edges
  • Brown leaf tips
  • Curling leaves
  • Dry new growth
  • Leaves that appear unusually limp
  • Slower growth

However, these symptoms are not exclusive to low humidity.

Overwatering, underwatering, excessive fertilizer, root problems, pests, poor lighting, temperature stress, and natural leaf aging can all cause similar symptoms.

Before assuming humidity is the problem, consider the plant’s overall care routine.

12. Don’t Confuse Low Humidity With Underwatering

This is a common mistake among new houseplant owners.

A plant with brown leaf tips may appear to need more water, leading the owner to water more frequently. But if the soil remains wet for long periods, increasing watering can damage the roots instead of solving the original problem.

Humidity and soil moisture are two different aspects of plant care.

A plant can experience dry air while its potting mix is still adequately moist.

Always check the soil and the plant’s watering requirements before adding more water.

13. Use the Right Potting Mix

Humidity management works best when it is combined with healthy root conditions.

Tropical plants generally need a potting mix that retains enough moisture for their needs while still allowing excess water to drain away.

A compact, waterlogged growing medium can reduce oxygen around the roots and contribute to root problems.

The exact mix depends on the plant. Some tropical foliage plants prefer a chunky, airy mixture, while others have different requirements.

Good drainage is important regardless of whether the surrounding air is humid.

14. Keep Plants Away From Extreme Temperature Changes

Humidity and temperature work together.

A tropical plant may struggle when exposed to sudden temperature changes, cold drafts, or extreme heat.

For many tropical houseplants, a stable indoor environment is preferable to constantly moving the plant between dramatically different conditions.

Avoid placing sensitive plants directly beside cold windows during chilly weather or directly above heating equipment.

A comfortable room for you is often a reasonable starting point, but always check the specific requirements of the plant species.

15. Give Humidity-Loving Plants Their Own Space

If you have several different types of houseplants, they do not all need the same humidity level.

Instead of trying to make the entire home highly humid, consider creating a dedicated area for plants that need more moisture in the air.

For example, you could group humidity-loving tropical plants on one shelf and keep plants that tolerate drier conditions elsewhere.

This makes environmental control easier and prevents you from unnecessarily increasing humidity throughout your entire home.

Common Mistakes When Increasing Humidity

Increasing humidity sounds straightforward, but several mistakes can create new problems.

Making the Room Too Humid

More humidity is not automatically better.

Extremely humid conditions combined with poor ventilation can encourage mold, fungal problems, and other issues.

The goal is an appropriate, stable environment rather than maximum humidity.

Keeping Leaves Constantly Wet

Tropical plants enjoy humid air, but that does not mean their leaves should remain wet all day.

Wet foliage combined with poor air movement can create problems.

Ignoring Ventilation

A sealed room with high humidity and little airflow can become uncomfortable for both plants and people.

Use gentle air circulation when needed.

Overwatering

Increasing humidity does not mean watering more frequently.

Always distinguish between moisture in the air and moisture in the soil.

Moving Plants Too Frequently

Plants need time to adjust to their environment.

Instead of constantly moving a struggling plant from one location to another, make one change at a time and observe how the plant responds.

Which Tropical Houseplants Benefit From Higher Humidity?

Many tropical houseplants can appreciate increased humidity, but some are particularly associated with humid growing conditions.

Examples include:

  • Calatheas
  • Marantas
  • Ferns
  • Anthuriums
  • Alocasias
  • Certain orchids
  • Some tropical palms
  • Many aroids

Individual plants can still vary considerably. A particular species may tolerate ordinary household conditions better than another plant from the same general group.

Research the specific plant rather than relying solely on its classification as a “tropical” houseplant.

How to Create a Simple Humidity Station

You do not need an elaborate indoor greenhouse to create a better environment for tropical plants.

A simple setup could include:

  1. A group of tropical plants placed together.
  2. A digital hygrometer for monitoring humidity.
  3. A humidifier positioned nearby but not blowing directly onto the plants.
  4. A small fan providing gentle air circulation.
  5. Plants positioned away from air-conditioning vents and strong drafts.
  6. Pots with proper drainage and an appropriate growing medium.

This setup gives you several ways to manage the environment without depending on a single technique.

How Long Does It Take to See Results?

The amount of time required depends on the plant and the underlying problem.

If dry air is contributing to crispy new growth, improving the environment may help prevent additional damage as new leaves develop. Existing brown areas, however, generally will not turn green again.

This is important when evaluating whether your humidity adjustments are working.

Instead of expecting damaged leaves to recover, watch for healthier new growth, improved leaf texture, and fewer signs of stress.

Plant care is often about observing what happens over several weeks rather than judging the results after one day.

A Practical Humidity Routine for Tropical Houseplants

A simple routine can make humidity management much easier.

Every Few Days

Check the plants for signs of dry or damaged foliage. Look at the soil as well, since watering should be based on the plant’s requirements rather than humidity alone.

Weekly

Check your hygrometer and inspect the area around your plants.

Make sure the humidifier is clean, the plants have adequate airflow, and no leaves are pressed against one another for extended periods.

Monthly

Evaluate whether your current setup is actually helping.

If certain plants continue developing dry leaf edges, reconsider their lighting, watering, root health, temperature, and humidity rather than automatically increasing moisture.

source: Balcony Garden Web

The Best Way to Increase Humidity for Tropical Houseplants

There is no single humidity trick that works for every home or every plant.

For most indoor gardeners, the most practical approach is a combination of methods. A humidifier can provide consistent moisture to the air, grouping plants can create a small microclimate, and moving plants away from drying drafts can prevent unnecessary moisture loss.

Humidity trays and occasional misting may have limited benefits, while enclosed cabinets and terrariums can provide much stronger humidity for plants that are suited to those environments.

Most importantly, remember that humidity is only one part of successful tropical plant care. Proper lighting, watering, drainage, nutrition, temperature, and airflow all work together.

When those factors are balanced, tropical houseplants have a much better opportunity to produce healthy leaves and steady new growth. Rather than trying to recreate a rainforest indoors, focus on creating a stable environment that matches the needs of the plants you actually grow.

The written content on this page was generated by ChatGPT.

How to Repot Houseplants Without Stressing Them

Repotting a houseplant can feel like a simple job: find a bigger pot, add some fresh soil, move the plant, and give it water. In reality, the process can be a little more delicate. A plant that has spent months or years becoming comfortable in its container may react poorly if its roots are handled roughly, its new pot is too large, or its growing conditions suddenly change.

The good news is that repotting houseplants does not have to be stressful for the plant. With the right timing, pot size, soil, and technique, you can give your plant more room to grow while keeping root disturbance to a minimum.

Repotting is also about more than making a plant look better in a new container. Over time, potting mix can break down and become compacted, while roots may eventually fill much of the available space. Fresh growing media can improve the environment around the roots, while a properly sized container gives them room to continue developing.

How to Repot Houseplants Without Stressing Them
image generated using Gemini

Why Do Houseplants Need to Be Repotted?

Houseplants live in a limited environment. Unlike plants growing directly in the ground, their roots cannot continue expanding indefinitely. Eventually, the available space, nutrients, and structure of the potting mix can become limiting.

Some plants may need repotting every couple of years, while slower-growing plants can remain in the same container for much longer. There is no universal schedule that works for every houseplant.

Instead of repotting simply because a certain amount of time has passed, pay attention to what the plant is telling you.

Common signs that a houseplant may need repotting include:

  • Roots growing through the drainage holes
  • Roots circling tightly around the inside of the pot
  • Water running through the pot unusually quickly
  • Soil that has become compacted or difficult to wet
  • Noticeably slower growth
  • A plant becoming unstable or top-heavy
  • The container becoming crowded with roots
  • Potting mix that has significantly broken down
  • A container that has cracked or warped because of expanding roots

Roots emerging from drainage holes do not automatically mean that a plant is in serious trouble. However, when combined with other signs of root congestion, they can indicate that the plant would benefit from more room.

Should You Repot a Houseplant That Looks Healthy?

Not necessarily.

One of the easiest ways to stress a houseplant is to repot it when there is no real reason to do so. Some plants actually prefer being somewhat root-bound and can remain healthy in the same container for years.

Before reaching for a new pot, take a moment to inspect the plant.

If it is producing healthy new growth, the soil is functioning well, water is draining normally, and the roots are not severely crowded, there may be no need to disturb it.

In some cases, replacing a portion of the old potting mix or adding fresh mix around the existing rootball can be enough.

The goal is not to repot as often as possible. The goal is to create conditions where the roots have adequate space, oxygen, moisture, and nutrients.

When Is the Best Time to Repot Houseplants?

For many houseplants, spring is an excellent time to repot because plants are entering a period of more active growth. This gives them an opportunity to recover from root disturbance and establish themselves in their new container.

Early summer can also work for many plants.

That does not mean you can never repot during another season. A plant with severe root problems, badly degraded soil, pests, or a damaged container may need attention regardless of the calendar.

However, if the plant is healthy and you are simply planning routine maintenance, working during an active growing period is generally the gentler choice.

Avoid repotting simply because you are eager to give a plant a new look. A healthy plant in a suitable pot is often better left alone than moved unnecessarily.

How to Choose the Right New Pot

Choosing the correct container is one of the most important parts of successful repotting.

A common mistake is assuming that a much larger pot is better because the plant will have more room to grow.

It sounds logical, but too much extra potting mix can remain wet for an extended period. Excess moisture around the roots can increase the risk of root problems. Both the RHS and University of Minnesota Extension recommend moving houseplants into only a moderately larger container rather than making a dramatic jump in pot size.

As a general rule, choose a container that is only a few inches wider than the current one, depending on the plant and its root system.

For example, if your plant is currently growing in a 6-inch pot, moving it into an 8-inch pot may be more appropriate than immediately placing it into a 12-inch container.

The exact size should depend on the plant, its rootball, growth rate, and moisture requirements.

Always Look for Drainage Holes

A decorative container may look beautiful, but it should not become a stagnant pool for your plant’s roots.

Choose a pot with adequate drainage holes so excess water can escape. Good drainage helps prevent roots from sitting in saturated growing media for extended periods.

If you prefer using a decorative cachepot without drainage, keep the plant in a separate nursery pot with drainage and place that pot inside the decorative container.

Just remember to empty accumulated water rather than allowing the plant to sit in it.

Choosing the Right Potting Mix

Do not automatically use ordinary garden soil for your houseplants.

Indoor plants generally do better with a potting mix formulated for container growing. The ideal mix depends on the species.

A tropical foliage plant may appreciate a mix that holds some moisture while still allowing plenty of air around the roots. Succulents and cacti generally require much sharper drainage. Orchids need a completely different type of growing medium.

Consider the natural growing conditions of your particular plant before choosing the mix.

For general houseplants, look for a quality indoor potting mix that provides a balance between moisture retention, drainage, and aeration.

If the plant is particularly sensitive to wet roots, a mix amended with appropriate materials such as perlite, bark, or other components may improve drainage.

There is no single “best potting soil” for every houseplant.

Gather Everything Before You Start

Repotting is easier when everything is ready before the plant comes out of its old container.

You may need:

  • A clean new pot
  • Fresh potting mix
  • A small scoop or trowel
  • Clean scissors or pruning shears
  • A clean work surface
  • Water
  • Newspaper or a tray to contain loose soil

If you are reusing an old container, clean it thoroughly first. This gives you an opportunity to remove old soil and debris before introducing the plant to its new environment.

Having everything within reach also means the plant spends less time sitting exposed with its roots out of the container.

Water the Plant Before Repotting

Whether you should water immediately before repotting depends somewhat on the plant and condition of the soil.

You generally want the rootball to hold together well enough to handle, but you do not want to work with a container that is dripping wet.

A plant that is extremely dry may have a rootball that crumbles easily when removed. On the other hand, excessively wet soil can become heavy and difficult to work with.

The objective is manageable, slightly moist growing media rather than a saturated rootball.

Step 1: Prepare the New Container

Place a small amount of fresh potting mix in the bottom of the new container.

Do not fill the entire pot yet.

You want enough mix so that, once the plant is positioned inside, the top of the rootball sits at an appropriate level below the rim.

Avoid burying the plant deeper than it was previously growing. The base of the stem should generally remain at a similar level to its original planting depth.

Step 2: Remove the Plant Carefully

This is where many people unintentionally cause damage.

Do not grab the leaves and pull.

Instead, support the plant and gently work the old container away from the rootball. If the plant is difficult to remove, tilt the container sideways and carefully ease the rootball out.

For stubborn plants, gently squeezing a flexible plastic pot can help loosen the rootball.

The key is patience.

If the roots are tightly attached to the inside of the container, forcing the plant out can tear delicate roots. Take your time rather than trying to complete the job as quickly as possible.

Step 3: Examine the Roots

Once the plant is out, take a look at the roots.

Healthy roots vary in appearance depending on the species. They may be white, cream, tan, or another normal color.

What you are looking for is excessive congestion, damaged tissue, or obvious signs of decay.

If roots are circling densely around the outside of the rootball, gently loosen some of them with your fingers.

You do not need to completely tear the rootball apart.

In fact, aggressive root manipulation can create unnecessary stress.

The goal is simply to encourage the roots to move outward into the fresh growing medium.

Should You Cut the Roots When Repotting?

Most houseplants do not need extensive root pruning during an ordinary repot.

If the plant is simply being moved into a slightly larger container, gentle loosening may be enough.

Remove roots that are clearly dead, mushy, or rotten using clean scissors or pruning shears. Avoid cutting healthy roots simply because they are visible.

Root pruning can be appropriate in some situations, particularly when a plant must remain in the same-sized container. However, it should be approached carefully because removing too much of the root system can add unnecessary stress.

For a typical houseplant that is being moved into a slightly larger pot, less intervention is usually better.

Step 4: Position the Plant

Place the rootball into the new container.

Check the height before adding more soil.

The plant should not be sitting so low that the stem is buried beneath a thick layer of fresh potting mix. At the same time, you do not want the rootball sitting so high that the roots are exposed.

Once the height looks right, begin filling around the sides with fresh potting mix.

Work gradually.

Add some mix, gently settle it around the rootball, and continue until the empty spaces have been filled.

There is no need to pack the soil down aggressively.

Roots need access to air as well as water, and excessively compacted growing media can interfere with healthy root conditions.

Step 5: Water Thoroughly

After repotting, water the plant thoroughly so the new potting mix becomes evenly moist.

Continue until water begins to come out through the drainage holes. This helps settle the growing medium around the roots.

Allow the excess water to drain completely.

Do not leave the container sitting in a saucer filled with water.

Afterward, return the plant to an appropriate location based on its normal light requirements.

Don’t Immediately Fertilize

Fresh potting mix may already contain nutrients, depending on the product.

There is usually no reason to rush into heavy fertilization immediately after repotting. The plant has just experienced physical disturbance, and its priority is adjusting to its new environment.

Give it some time to settle.

Once you see signs of renewed growth, resume your normal feeding routine according to the plant’s needs and the instructions for your fertilizer.

Give Your Plant a Recovery Period

A newly repotted plant may not look dramatically different right away.

It might even appear slightly tired for a few days.

That does not necessarily mean something went wrong.

Moving a plant involves some degree of root disturbance, even when the process is done carefully. During the recovery period, avoid making several other major changes at the same time.

For example, there is usually little benefit in repotting a plant and immediately moving it to a completely different lighting environment, drastically changing its watering routine, and heavily pruning it.

Give the plant time to adjust.

Keep its lighting conditions appropriate, monitor moisture carefully, and avoid unnecessary handling.

How Much Should You Water After Repotting?

One of the biggest mistakes after repotting is assuming that a plant needs frequent watering because it has fresh soil.

It doesn’t.

In fact, a larger container with fresh potting mix may retain moisture differently from the old container.

Check the plant and growing medium rather than following a rigid watering schedule.

Some plants prefer to dry somewhat between waterings, while others prefer more consistent moisture.

The important thing is to understand the needs of the individual plant.

Remember that drainage is essential because roots require oxygen. When growing media remains saturated for long periods, air spaces can become filled with water, creating unfavorable conditions for roots.

Signs Your Plant Is Stressed After Repotting

Even a carefully repotted houseplant may show temporary signs of stress.

You might notice:

  • Slight leaf drooping
  • A temporary slowdown in growth
  • A few older leaves yellowing
  • Leaves appearing less firm than usual
  • Minor changes in appearance

These symptoms should be monitored rather than immediately treated with more water, fertilizer, or additional repotting.

Overreacting can sometimes make the situation worse.

For example, if a plant droops after repotting, automatically adding more water may create a second problem if the soil is already moist.

Instead, check the growing medium and the plant’s environment first.

What If the Leaves Start Turning Yellow?

Yellow leaves after repotting can have several possible causes.

The plant may be experiencing temporary stress, but yellowing can also be associated with excessive moisture, poor drainage, insufficient light, nutrient issues, or other growing conditions.

Look at the whole plant rather than diagnosing the problem from one leaf.

If the soil remains wet for an unusually long time, check the drainage and pot size. A container that is substantially larger than the rootball can hold more unused moisture, increasing the risk of root problems.

If the plant otherwise looks healthy and only an older leaf has yellowed, there may be no reason for alarm.

Common Repotting Mistakes to Avoid

Using a Pot That Is Too Large

Bigger is not always better.

An oversized container can contain a large volume of potting mix that remains wet around a relatively small root system.

Choose a modest increase in pot size instead.

Using a Container Without Drainage

A beautiful pot is not worth sacrificing healthy roots.

If there is no drainage hole, use it as an outer decorative container and keep the plant in a suitable inner pot.

Breaking Apart the Entire Rootball

Some gardeners believe they need to completely remove all old soil before repotting.

That is not always necessary.

For many healthy houseplants, preserving much of the existing rootball while gently loosening crowded roots is a less disruptive approach.

Burying the Stem Too Deeply

Adding too much soil around the base of the plant can create problems.

Try to maintain approximately the same planting depth the plant had before repotting.

Compressing the Soil Too Firmly

Fresh potting mix should provide support without becoming a hard, compact mass.

Settle it gently around the rootball instead of crushing it down.

Fertilizing Too Aggressively

A recently disturbed plant does not need a heavy dose of fertilizer to “recover faster.”

Let the plant settle before returning to a regular feeding routine.

Repotting Every Plant on the Same Schedule

Different plants grow at different speeds and have different root systems.

A fast-growing tropical plant may need more frequent attention than a slow-growing succulent.

Learn to read the plant rather than relying entirely on a calendar.

Can You Repot a Plant Into the Same Pot?

Yes.

Repotting does not always mean upgrading to a larger container.

If the current pot is appropriate in size but the potting mix has deteriorated, you may be able to refresh the growing medium and return the plant to the same container.

This can be especially useful when a mature plant has reached the size you want and you do not want it to become larger.

In some situations, careful root pruning combined with fresh growing media can allow a plant to remain in the same-sized container. However, the amount of root removal should be limited and appropriate for the particular plant.

How Often Should You Repot Houseplants?

There is no universal repotting schedule.

Some houseplants may be happy in the same container for several years, while rapidly growing plants may need attention sooner.

The RHS notes that many container plants can benefit from repotting every few years, but the plant’s vigor, growing medium, and container size all influence how frequently repotting is necessary.

Instead of marking a specific date on your calendar, make root inspection part of your regular plant-care routine.

Look underneath the pot.

Pay attention to how quickly the soil dries.

Watch for changes in growth.

These clues are often more useful than a fixed schedule.

Special Considerations for Succulents and Cacti

Succulents and cacti generally have different watering and drainage requirements from many tropical houseplants.

When repotting them, use a growing medium that drains readily and avoid putting them into an oversized container.

Because these plants are adapted to periods of dryness, keeping them in a large volume of damp soil can create unfavorable conditions around their roots.

Allow the growing medium and watering routine to reflect the plant’s specific needs rather than treating every houseplant the same way.

Special Considerations for Tropical Houseplants

Plants such as monstera, philodendrons, pothos, and other tropical foliage plants may appreciate a growing medium that retains some moisture while still providing good aeration and drainage.

Many tropical plants also respond well to repotting during active growth.

However, even vigorous tropical plants can experience stress if their roots are aggressively disturbed.

When possible, preserve the healthy rootball and make the transition gradually.

What to Do With a Root-Bound Houseplant

A severely root-bound plant may have roots circling the entire rootball and filling most of the container.

If the roots are extremely congested, simply dropping the rootball into a larger pot may not solve the underlying problem.

Gently tease apart some of the outer roots.

If necessary, carefully trim severely congested or damaged sections.

Then move the plant into an appropriately sized container.

Avoid jumping from a tiny pot into an enormous one. The objective is to give the root system usable space, not surround it with a huge amount of unused wet soil.

Repotting Doesn’t Have to Be a Dramatic Event

The idea of repotting can make new plant owners nervous because the roots are hidden most of the time.

Once the plant comes out of its container, it can be tempting to start cutting, pulling, cleaning, and rearranging everything.

Resist that urge.

A gentle approach is usually the better approach.

Remove the plant carefully. Inspect the roots. Remove obvious damaged material. Loosen severe congestion where appropriate. Give it fresh growing media. Use a reasonably sized container. Water thoroughly and let it drain.

Then leave the plant alone to settle.

That is often all it needs.

A Simple Houseplant Repotting Checklist

Before you begin, ask yourself:

Does the plant actually need repotting?

Check the roots, soil, drainage, and growth.

Is the new pot only moderately larger?

Avoid excessive extra space around a small rootball.

Does the container have drainage holes?

Good drainage is essential for healthy roots.

Is the potting mix appropriate for the plant?

A cactus does not have the same requirements as a tropical foliage plant.

Can you remove the plant without pulling aggressively?

Take your time.

Are the roots healthy?

Remove only damaged or clearly unhealthy roots when necessary.

Is the plant being planted at the correct depth?

Do not bury the stem unnecessarily.

Will you allow the excess water to drain?

Never leave the plant sitting in standing water.

Can you give the plant a quiet recovery period?

Avoid making several major changes at once.

source: Washington Post

Final Thoughts on Stress-Free Houseplant Repotting

Repotting a houseplant is less about giving it the biggest possible container and more about creating a healthy environment for its roots.

The most important steps are surprisingly simple: repot when the plant needs it, choose a suitable pot, use appropriate growing media, handle the roots gently, provide drainage, and avoid overwatering afterward.

A little patience goes a long way.

Before reaching for the largest pot you can find, inspect the root system. Before cutting roots, decide whether cutting is actually necessary. Before watering again, check whether the soil is already moist.

When you approach repotting as a careful transition rather than a complete overhaul, your houseplants have a much better chance of settling in quickly and continuing healthy growth.

A thriving indoor garden is built through small, consistent decisions. Giving roots the right amount of space, moisture, air, and fresh growing media is one of the simplest ways to keep those plants growing beautifully for years.

The written content on this page was generated by ChatGPT.

How to Save a Dying Plant: Common Causes, Proven Fixes, and Expert Tips for Bringing It Back to Life

There is something deeply satisfying about caring for a plant. Watching fresh leaves unfurl, flowers bloom, or vegetables ripen creates a sense of accomplishment that few hobbies can match. That is why it feels especially disappointing when a healthy-looking plant suddenly begins to wilt, develop yellow leaves, or stop growing altogether.

The good news is that a struggling plant is not always beyond saving. In fact, many plants recover remarkably well once the real problem is identified. A drooping stem or browning leaf is not necessarily a sign that your gardening efforts have failed. More often, it is the plant’s way of asking for different care.

Many gardeners make the mistake of reacting too quickly. A wilted plant gets more water. Yellow leaves lead to extra fertilizer. A slow-growing houseplant is moved from one location to another every few days. While these actions are usually well intentioned, they often make matters worse because the root cause has not been identified.

Learning to “read” your plants is one of the most valuable gardening skills you can develop. Leaves, stems, roots, flowers, and even the soil provide clues about what is happening beneath the surface. Once you know what those clues mean, reviving a declining plant becomes much easier.

This guide explores the most common reasons plants begin to fail, practical solutions that actually work, and preventative habits that help keep your indoor and outdoor plants thriving throughout the year.

How to Save a Dying Plant: Common Causes, Proven Fixes, and Expert Tips for Bringing It Back to Life

Is Your Plant Really Dying or Simply Stressed?

Before attempting to rescue a plant, determine whether it is experiencing temporary stress or irreversible damage.

Plants often react dramatically to changes in their environment. A sudden move, inconsistent watering, or a week of unusually hot weather can cause leaves to droop even though the plant remains perfectly healthy beneath the soil.

Look for these warning signs:

  • Leaves turning yellow
  • Brown or crispy leaf edges
  • Wilting despite moist soil
  • Dry, brittle stems
  • Leaf drop
  • Black spots on foliage
  • Mushy stems
  • Stunted growth
  • Mold developing on the soil
  • Roots growing through drainage holes

A plant displaying several of these symptoms may still recover if the underlying issue is corrected early.


Step One: Examine the Entire Plant

Instead of immediately watering or fertilizing, spend a few minutes inspecting the entire plant.

Check the following:

  • Soil moisture
  • Leaf color
  • Stem firmness
  • Root condition
  • Presence of insects
  • Sunlight exposure
  • Drainage
  • Pot size

Many plant problems become obvious after a careful inspection.

For example, yellow leaves with soggy soil usually point toward overwatering, while crispy brown leaves paired with dry soil often indicate dehydration.


Common Cause #1: Overwatering

Ironically, giving plants too much attention is one of the biggest reasons they decline.

Roots require both water and oxygen. When soil remains saturated for days, oxygen disappears, causing roots to suffocate and eventually rot.

Warning Signs

  • Yellow leaves
  • Leaves falling off
  • Mushy stems
  • Soft trunk
  • Foul smell from soil
  • Mold on the surface
  • Fungus gnats flying around the pot

These symptoms often resemble underwatering, leading many gardeners to add even more water and worsen the problem.

How to Save an Overwatered Plant

Stop watering immediately.

Allow the soil to dry partially before watering again.

If root rot has begun:

  • Remove the plant from its container.
  • Wash excess soil from the roots.
  • Trim away black or mushy roots using sterilized scissors.
  • Repot using fresh, well-draining potting mix.
  • Water lightly after repotting.

Healthy roots should appear white or cream-colored and feel firm to the touch.


Common Cause #2: Underwatering

Although many plants tolerate occasional dryness, prolonged lack of moisture weakens the entire plant.

Without enough water, roots cannot transport nutrients to the leaves, causing the plant to shut down many of its normal processes.

Symptoms

  • Dry soil pulling away from the pot
  • Wilted leaves
  • Crispy leaf tips
  • Curling foliage
  • Premature flower drop
  • Slow growth

Recovery Steps

Water deeply rather than giving frequent small amounts.

Continue watering until moisture drains from the bottom of the pot.

If soil has become extremely dry and compacted, soak the container in a basin of water for about 30 minutes to rehydrate the root ball.

Once the soil has recovered, establish a regular watering routine instead of watering only when the plant appears distressed.


Common Cause #3: Too Much or Too Little Sunlight

Light influences every stage of plant growth.

Some plants thrive in direct sunlight for eight hours each day, while others burn after just a few hours of afternoon exposure.

Signs of Insufficient Light

  • Long, weak stems
  • Pale foliage
  • Small leaves
  • Little or no flowering
  • Slow growth

Signs of Excessive Sun

  • Bleached leaves
  • Brown patches
  • Crispy edges
  • Leaf scorch
  • Rapid drying

Before moving a plant, research its preferred light conditions.

A peace lily, for example, enjoys bright indirect light, while tomatoes require several hours of direct sunlight to produce fruit.

Whenever relocating a plant, make gradual adjustments rather than moving it from deep shade directly into full sun.


Common Cause #4: Poor Soil

Healthy roots begin with healthy soil.

Over time, soil becomes compacted, depleted of nutrients, or unable to drain effectively.

Compacted soil restricts root growth and limits access to oxygen.

Poor-quality soil often causes:

  • Weak stems
  • Slow growth
  • Yellow leaves
  • Poor flowering
  • Frequent watering problems

Improve soil by mixing in:

  • Compost
  • Coconut coir
  • Perlite
  • Worm castings
  • Organic matter

These materials improve drainage while increasing moisture retention and nutrient availability.


Common Cause #5: Nutrient Deficiencies

Plants need more than sunlight and water.

They also depend on essential nutrients to build leaves, flowers, roots, and fruit.

Nitrogen Deficiency

Symptoms include:

  • Yellow older leaves
  • Thin stems
  • Slow development

Potassium Deficiency

Look for:

  • Brown leaf margins
  • Weak growth
  • Poor flowering

Iron Deficiency

Common signs include:

  • Yellow young leaves
  • Green veins

Rather than applying fertilizer randomly, choose a balanced plant food appropriate for the species you are growing.

Remember that excessive fertilizer can burn roots just as easily as nutrient deficiency can weaken them.


Common Cause #6: Root Bound Plants

Container plants eventually run out of room.

When roots circle endlessly inside the pot, they struggle to absorb sufficient water and nutrients.

Signs include:

  • Water running straight through the container
  • Roots emerging from drainage holes
  • Little new growth
  • Constant wilting

Choose a container one or two inches larger than the current one.

Loosen tightly wound roots before placing the plant into fresh potting mix.


Common Cause #7: Pest Infestations

Tiny insects can cause surprisingly large problems.

Some feed on plant sap, while others damage leaves or roots.

The most common garden pests include:

  • Spider mites
  • Aphids
  • Mealybugs
  • Whiteflies
  • Scale insects
  • Fungus gnats

Watch for:

  • Sticky residue
  • Tiny moving insects
  • White fuzzy patches
  • Fine webbing
  • Distorted leaves

Treat infestations early using insecticidal soap, neem oil, or a strong stream of water.

Regular inspections prevent small populations from becoming major infestations.


Common Cause #8: Plant Diseases

Unlike insect damage, diseases often spread quickly if left untreated.

Common diseases include:

  • Powdery mildew
  • Leaf spot
  • Root rot
  • Stem rot
  • Rust fungus

Remove infected leaves immediately.

Avoid overcrowding plants, as poor air circulation encourages fungal diseases.

Always disinfect pruning tools after working with diseased plants.


Common Cause #9: Temperature Stress

Plants dislike sudden environmental changes.

Indoor plants may suffer when placed near heating vents or air conditioners.

Outdoor plants often struggle during:

  • Heat waves
  • Unexpected frost
  • Strong winds
  • Rapid temperature swings

Protect plants with mulch, row covers, or shade cloth depending on the season.

Maintaining a stable growing environment significantly reduces stress.


Common Cause #10: Low Humidity

Many popular houseplants originate from tropical forests where humidity levels remain high year-round.

Dry indoor air often causes:

  • Brown leaf tips
  • Curling leaves
  • Crispy edges
  • Slow development

Increase humidity by:

  • Running a humidifier
  • Grouping plants together
  • Using pebble trays
  • Keeping tropical plants away from heating vents

Higher humidity encourages healthier foliage and stronger growth.


A Simple Recovery Plan for Almost Any Plant

If you are unsure what is wrong, follow this step-by-step approach instead of making multiple changes at once.

Inspect Carefully

Study every part of the plant.

Look underneath leaves, inspect stems, and gently examine the roots if necessary.

Remove Dead Growth

Prune away dead flowers, damaged stems, and brown leaves.

This encourages the plant to direct its energy toward healthy new growth.

Improve Growing Conditions

Correct only the problems you discover.

Changing watering, lighting, fertilizer, humidity, and soil simultaneously makes it difficult to know which adjustment helped.

Give the Plant Time

Recovery rarely happens overnight.

Many plants require several weeks before producing noticeable new growth.

Patience is often one of the most effective gardening tools.


Plants That Commonly Bounce Back

Some plants are naturally resilient and recover quickly after proper care.

These include:

  • Snake Plant
  • Spider Plant
  • Pothos
  • ZZ Plant
  • Aloe Vera
  • Peace Lily
  • Philodendron

Even if these plants lose leaves, healthy roots can often produce fresh growth.


Preventing Plant Problems Before They Start

Most plant emergencies can be avoided through consistent maintenance rather than dramatic interventions.

Develop habits such as:

  • Water only when the soil needs it.
  • Rotate indoor plants every few weeks for even growth.
  • Inspect leaves weekly for pests.
  • Wipe dust from foliage.
  • Repot plants before they become root bound.
  • Fertilize according to the growing season.
  • Remove dead leaves regularly.
  • Use pots with proper drainage.
  • Sterilize gardening tools after pruning.

Small, consistent efforts usually produce healthier plants than occasional intensive care.


Frequently Asked Questions

Can a completely wilted plant recover?

Yes. If the roots remain healthy and the stem is still alive, many plants recover after watering, improved drainage, or better growing conditions.

Should I cut off yellow leaves?

Yes. Leaves that are completely yellow or brown no longer contribute to the plant’s health. Removing them allows the plant to focus energy on producing new growth.

Is tap water safe for plants?

Most plants tolerate tap water well, although some sensitive species prefer filtered or rainwater if your local water contains high levels of minerals or chlorine.

How long does it take for a dying plant to recover?

Minor stress may improve within a week, while plants recovering from root damage, severe dehydration, or pest infestations may require several months before returning to full health.

Can too much fertilizer kill a plant?

Absolutely. Excess fertilizer causes salt buildup in the soil, which burns roots and often results in brown leaf edges, wilting, and poor growth.

source: All About Plants

Final Thoughts

Every experienced gardener has watched a favorite plant struggle at some point. The difference between success and failure is rarely luck. It comes from learning to recognize early warning signs and responding with the right solution instead of guessing.

Most declining plants are simply reacting to conditions that can be corrected, whether that means adjusting your watering routine, improving soil quality, increasing humidity, or giving the plant more suitable light. Rather than seeing a struggling plant as a lost cause, view it as an opportunity to better understand how plants grow and what they need to flourish.

With careful observation, patience, and a willingness to make gradual adjustments, you can often bring a fading plant back to life. As your confidence grows, you’ll find that preventing future problems becomes just as rewarding as rescuing the plants you once thought were beyond saving.

The written content on this page was generated by ChatGPT.

Scroll to top